Sonosax Mini R82 Review
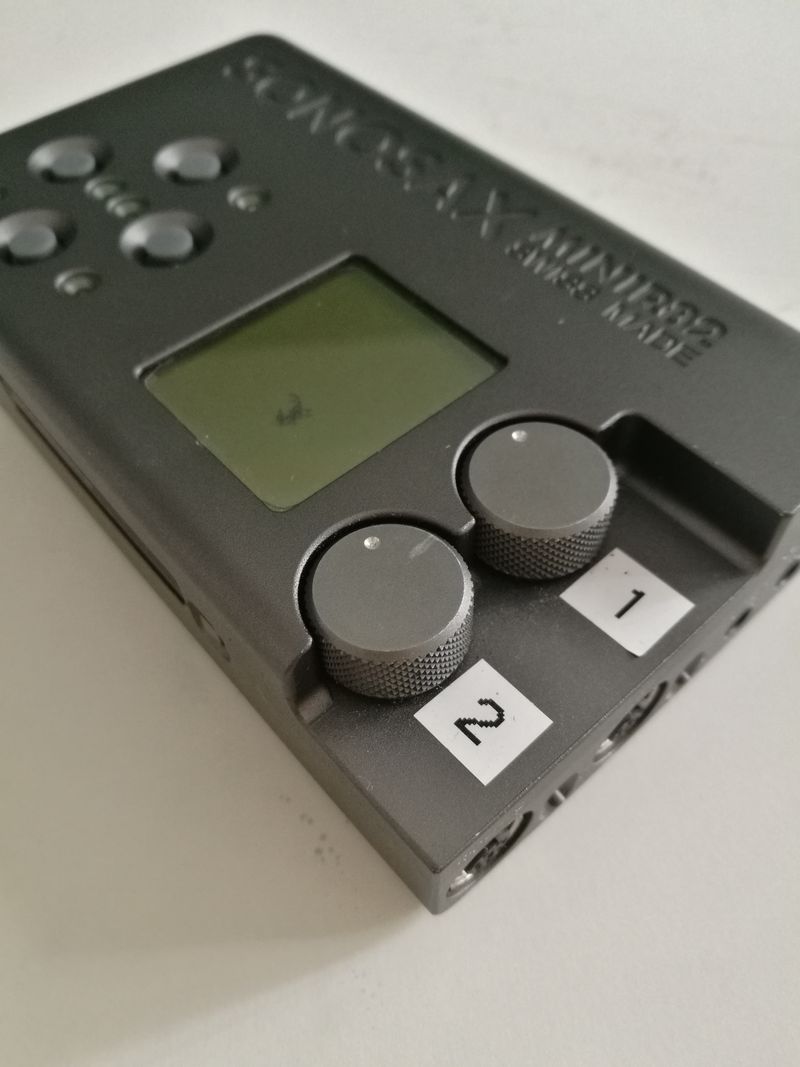
Sonosax Mini R82
Intro
When I was in the market for a new recorder, the Sonosax Mini R82 was the winner.
Ever since I saw the R82, I knew I wanted to have it. It was an odd looking piece and like nothing out there which was why I initially hesitated to go down that route. This and the fact that there is almost no review, working photos, or anything out there that describes the experiences of using it. I also found that the manual, though comprehensive, still was not a substitute for this review. I have been using the R81 for one year now and am now comfortable to tackle any job with it. Let's take a look.
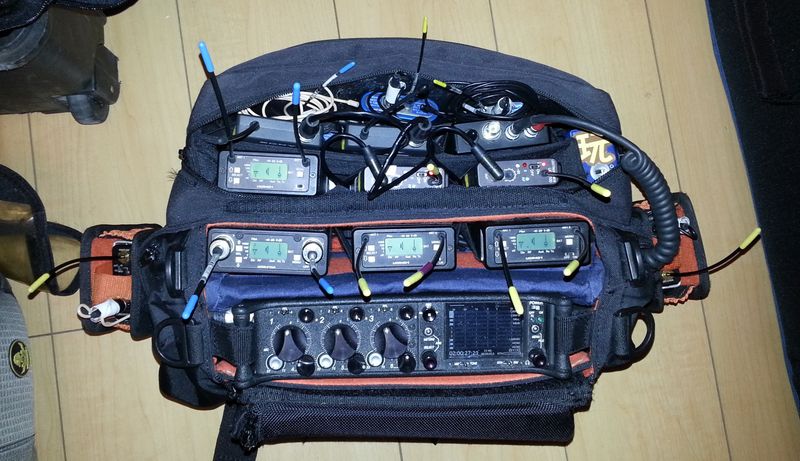
My previous typical setup- fully loaded
Story
I have wanted this recorder ever since I laid my eyes on it. Still finding out what kind of jobs I wanted to focus on, I, like many others, opted for Sound Devices recorders which had all the things you needed in the industry. As time moved on and I started to focus my efforts on documentaries and my own artistic projects, I found that I was only lugging my 633 around for work and nothing else. It was just too big and clunky to carry and I found I was carrying my Sony D50 with or without my 302 to record ambiences anyway.
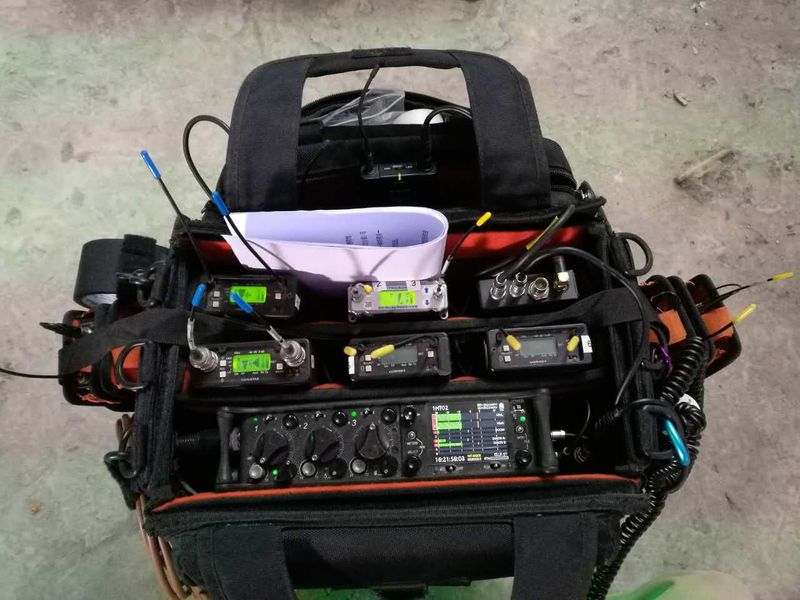
Fully loaded. Just looking at it makes my back hurt.
My trusty Petrol bag and Lectrosonics microphones were an unstoppable force. My typical bag with three receivers, all the batteries, receivers and recorders came to about 6-7+ kg. When I first bought all these equipment in 2013, I felt that this was what it meant to be professional, I just had to tough it out. I got some reality jobs that required me to be on my feet continuously recording for long periods of time. My back never seemed to relax and I knew that this was going to bite me in a big way later on if I kept on this route (which it did). I was always looking for other alternatives to my kit but never found the recorders that were comparable or better than my 633. The R82 was always in the back of my mind but I never seriously considered it until last year when I felt it was time to get rid of my heavy kit and start over. I realized that 90+% of my jobs that I wanted to work on (docs, corporate) only required maximum 1-2 wirelesses at a given time. So all my other cabinets of gear were just wasting away waiting for another turn at bat.
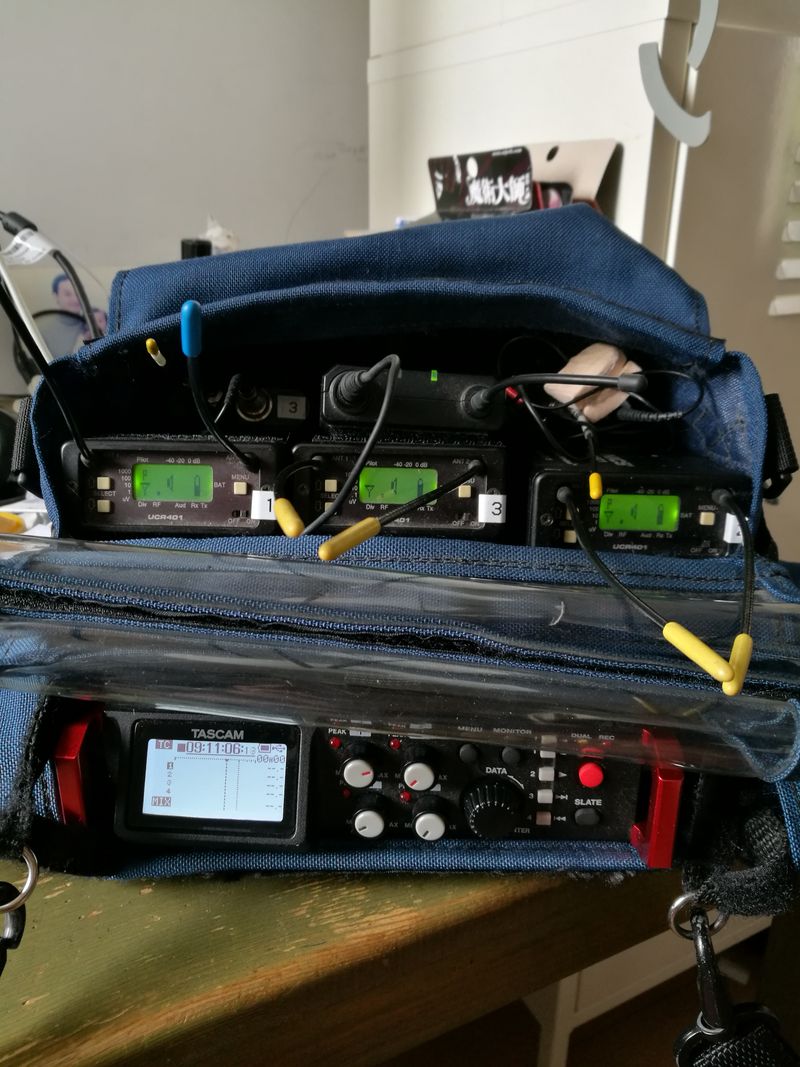
Getting there... My first mini setup with a Tascam DR-701D. Still a bit heavy even with battery powered UCR401 (which have awesome battery life BTW)
Another factor of replacing my equipment which was the final straw, was the recent FCC restrictions on my Lectrosonics blocks (24/26). So at the end of 2017 I decided to make the plunge and sell all my equipment and buy new. This would give me a chance to build not only my dream kit, but also the kit that would be perfect for the kind of work I wanted to be doing for the rest of my career.
Since I was already on SD and Lectro there were very few manufacturers that were equal to or ‘better’ than this. Ergonomics was very important to me. There were many choices of small recorders but after researching, I decided on the Sonosax/Lectro combination for my kit. The new R4+ had come out the year before and was the natural unit to purchase but it seemed to me there was still going to be a lot of baggage that went with it and would be a similar experience as what I had with my 633, which was not desirable. Then I started to hypothesize how the R82 could fit. It was no easy task as the manual is kind of cryptic without the unit in front of you and this led to several emails with multiple questions to Pierre at Sonosax. But in the end I ordered all my equipment in December 2017 and by January began using it on new projects.
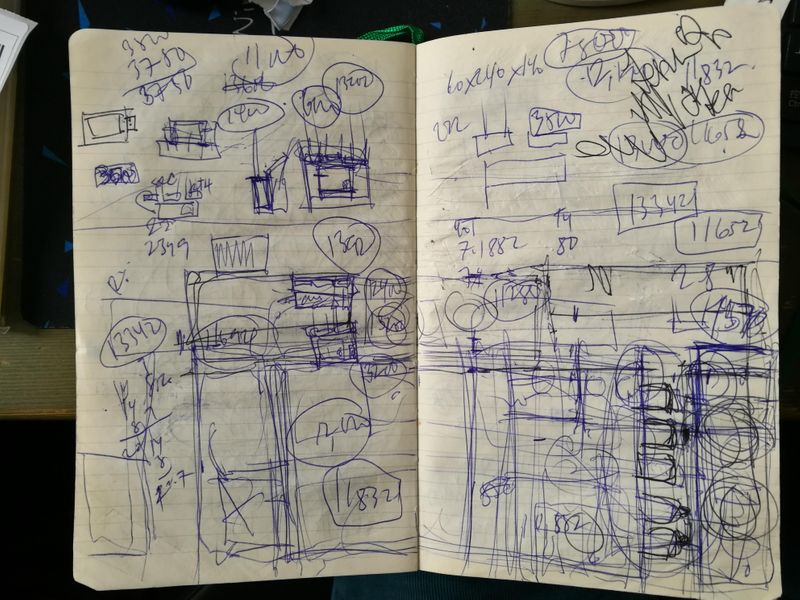
Sketchbook pictures. Scale diagram
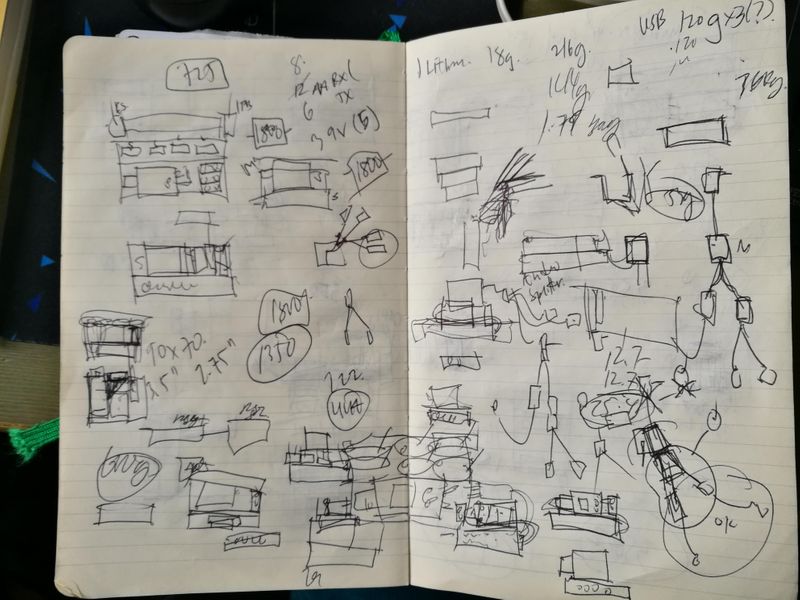
Cabling
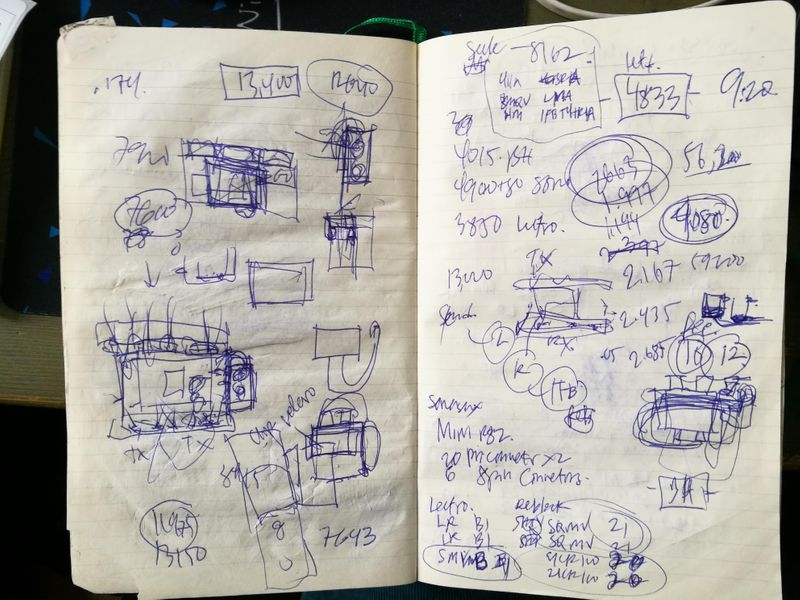
Budgeting and layout
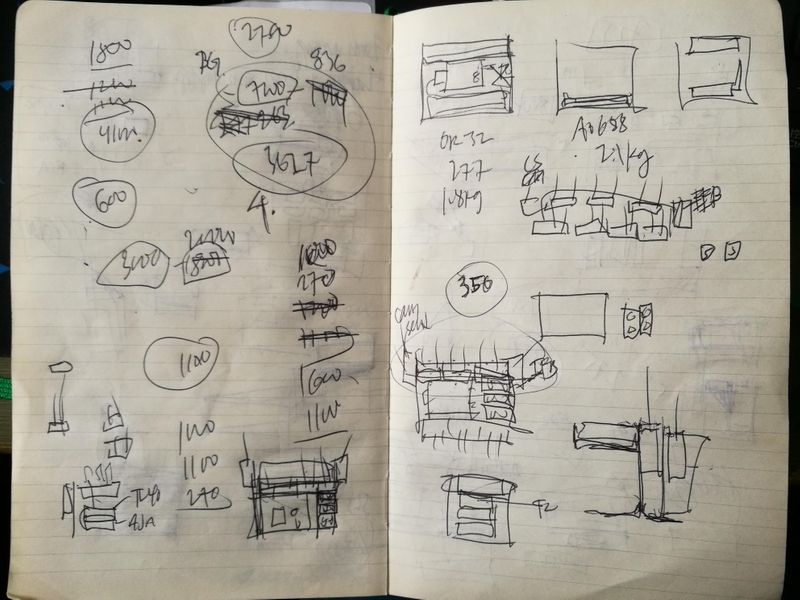
Layout options
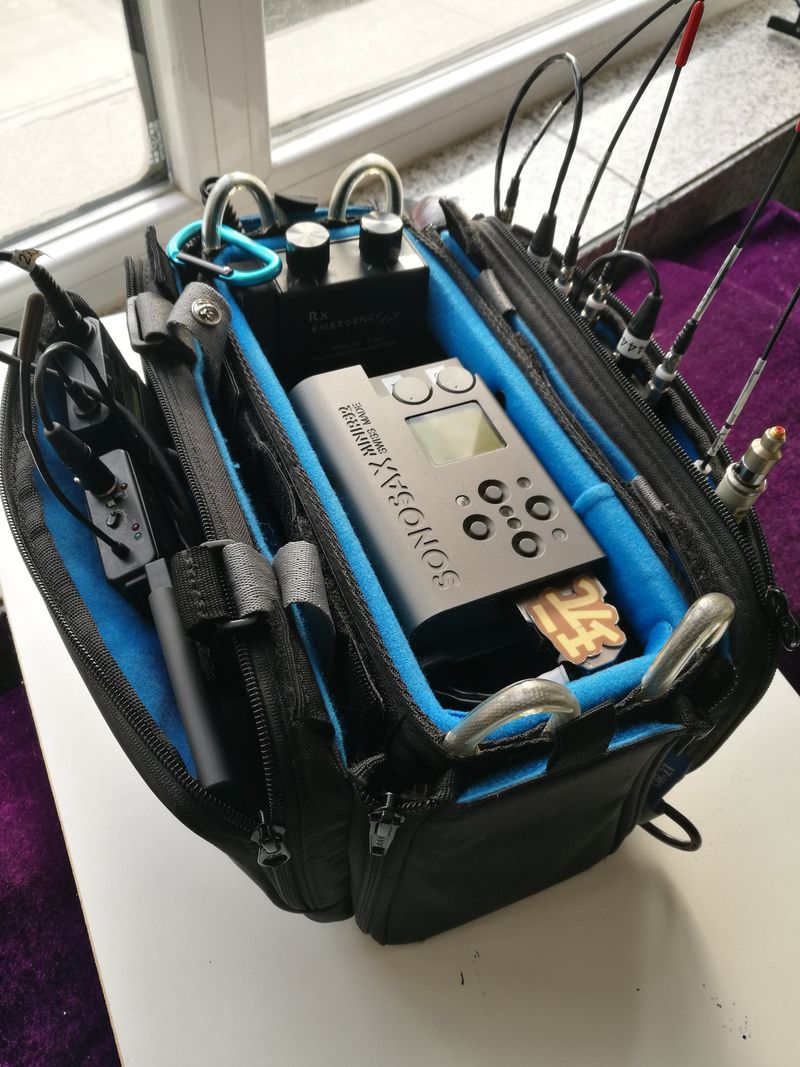
Final configuration
Like any piece of new equipment, there is definitely a teething period. I had to come up with solutions to my problems and also how to make things more efficient, flexible, and lighter. Over the course of one year I have used this unit and I want to share my experiences with you so that if you are going to commit- and you really have to commit- then you can at least be confident that you have everything you need to know to hit the ground running.
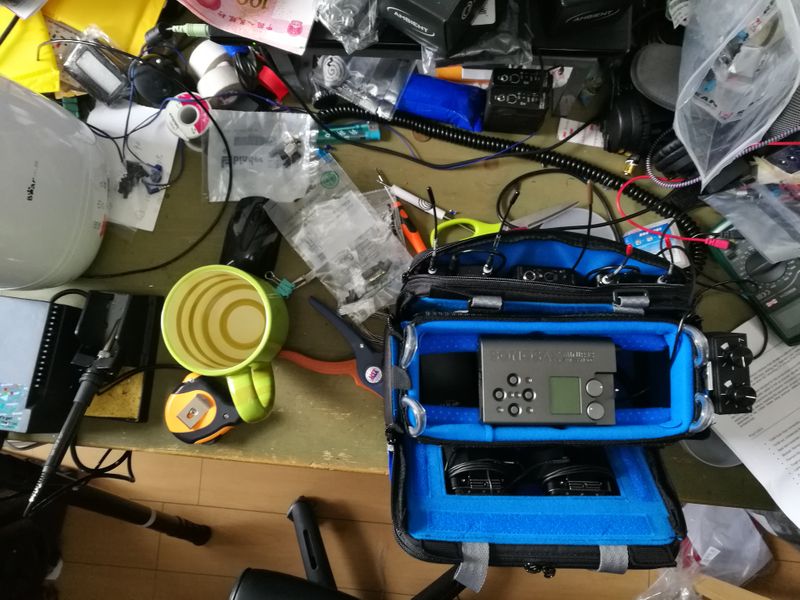
January 2018. Starting from scratch
Introduction

Sonosax is a company that needs no introduction in the world of recording. Ever since they began making high-end portable mixing consoles in 1980, their consoles have been used on countless award-winning films and Jacques Sax has himself won a technical achievement Oscar for his products. Sonosax pride themselves on using the best quality for their products and as a result the sound that goes through their machines are ‘true-to-life’.
Overview
The MiniR82 is not a new machine. Forums and videos show that it has been on the market since 2010. Since then I have dreamed of this recorder. The R82 is the smallest professional digital 8-track recorder on the market even today. With features such as timecode in, internal SSD hard drive, CF card, line in, digital input, and of course two of the famous Sonosax analog inputs and limiters, the unit boasts pretty impressive specs for its size. Its size, however, comes at a cost with a few hardware compromises that may have kept potential sound recordists from buying this amazing unit. On top of that, images and information about this unit are very few and unfortunately don’t give this unit the justice it derserves. Until now.
I think that the R82 can be called a ‘Hybrid’ recorder. For bigger jobs with a good amount of tracks and the equipment that goes with it, it is an 8 track digital recorder. For smaller run and gun, interview, and documentary shoots, it is your 1-4 track recorder in a bag. The R82’s size is not indicative of its capabilities and that is what makes it so versatile and surprising.
I will talk about my thoughts of the unit and explain my final bag configuration so you can see how it can be used in a typical sound bag setup.
In the box
It all begins with the box. I remember opening the box for the first time. It came in a grey cardboard box. It felt heavy and when I opened it i found that there was a beautiful engraved wooden box much like a luxury watch (this is from Switzerland after all). Beautiful, and a feeling that whatever was inside was precious. In the box was the recorder, all the wires I ordered, SD to CF card adapter, and SD card wallet. The purchase includes (1) 3M serial connector and (2) Binder connectors.
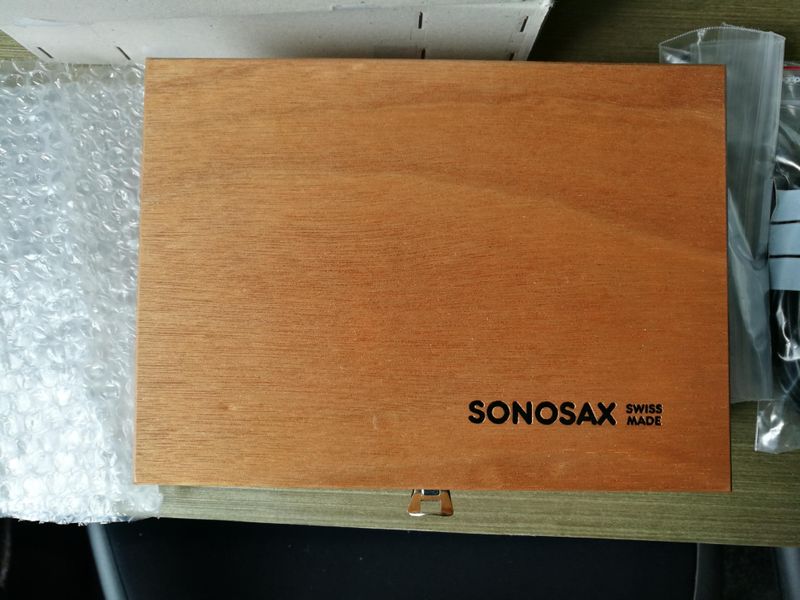
Beautiful wooden case...
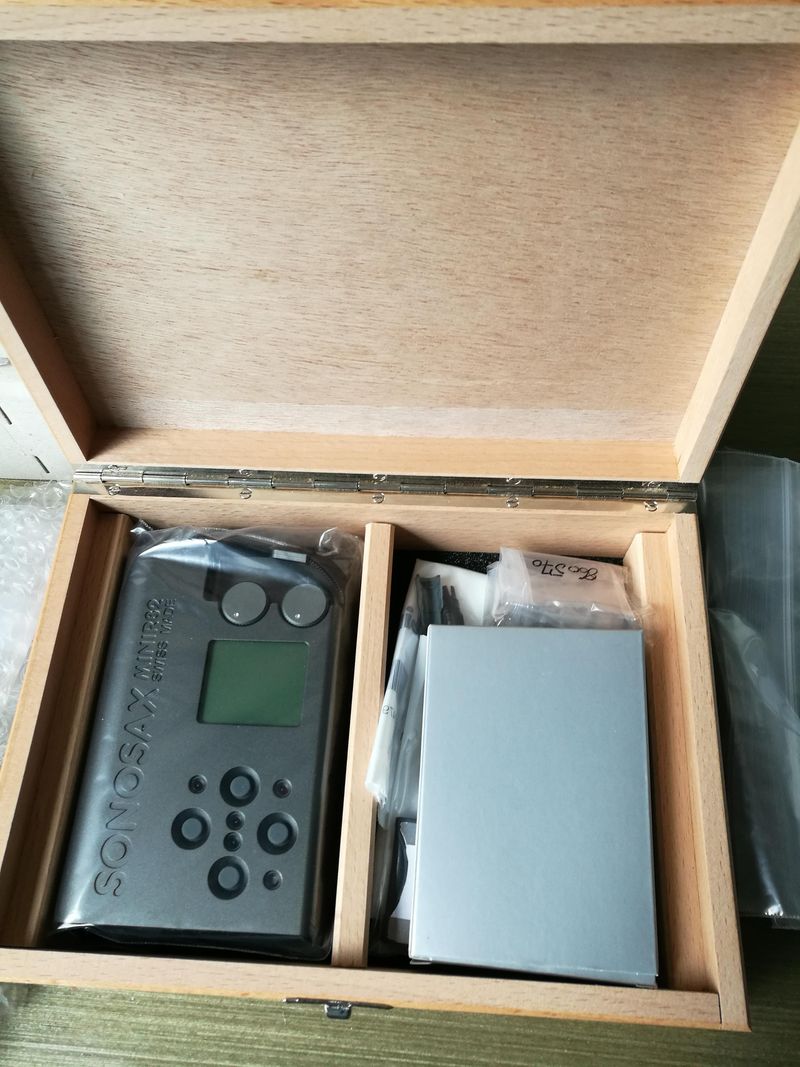
... for a beautiful recorder
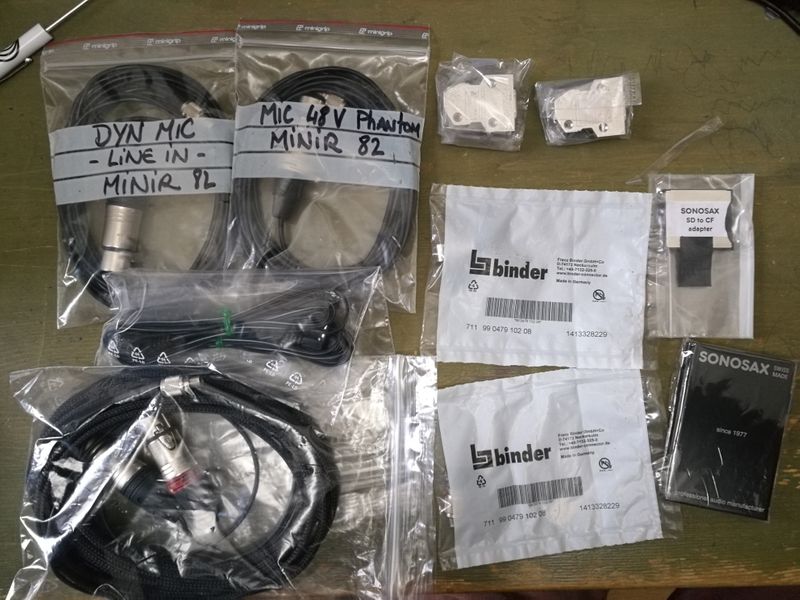
Cables and connectors
Initial thoughts
Price
The unit is competitively priced as a high-end 8 track professional recorder. Sonosax gave me a discount on the extra cables/ accessories I ordered so the price came out to be around 4900 ChF which is the about the same amount in US dollars. [I don’t know how many units they still have in their warehouse, but it must be a fair few seeing as how it is still on the website after all these years. Or not?]
Customer Service
Sonosax customer service is quite comprehensive but they are a small company and one of a handful of people answer messages as soon as they possibly can. Pierre was my point of contact for all my questions and as it was nearing the Christmas holidays, some replies would take a couple of days up to a week. Perhaps a FAQ technical database could be beneficial to them as users could query their issues there first rather than write to them on an individual basis. Nonetheless, the personal contact is very, very, very much appreciated. Thanks Pierre and good luck on your new adventures!
Unit overview
‘No frills, just great sound’ is the phrase I would use to characterize the experience of using this recorder. No flashy multicolored lights or color screens here. The entire unit seems to be designed to make the recordist focus on one thing- getting great sound.
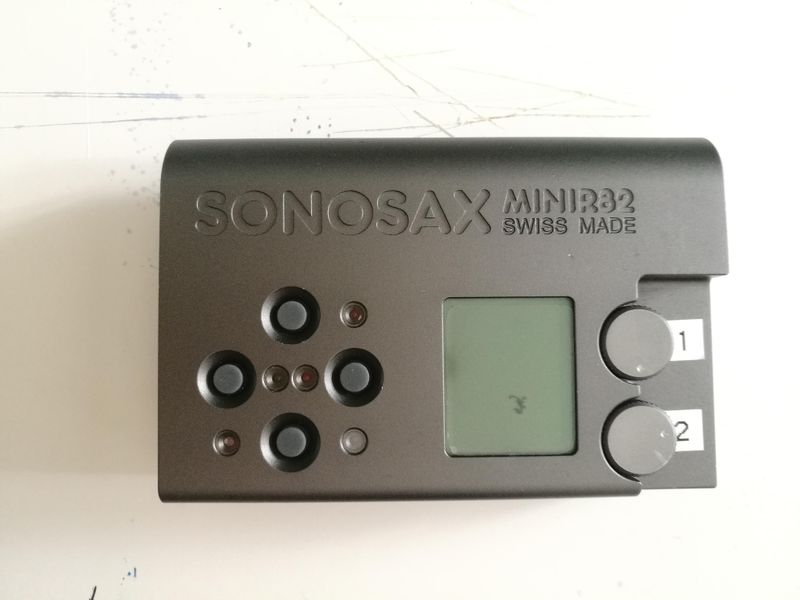
Front face. Hello beautiful
Face
Mark my words: this is the sexiest recorder you will handle. The metal matte finish and sexy rounded edges are as smooth as a silk stocking and just begs you to touch it. The burled fader knobs give a sinful bite and the large engraved Sonosax logo instill confidence and envy to all who see and use it. It's the Marilyn Monroe (or equivalent) of recorders and it's even in black and white (and green).
The layout is as minimal as it gets. The front face feature four squishy but firm buttons, and four LEDs that are sealed against the elements that indicate record/play mode, limiters, and clipping for the two preamps. The fifth eye is an optical sensor that automatically controls the brightness of the LEDs and LCD screen backlight. The fader knobs are flush with the face and semi-recessed in a cut out that should be comfortable enough for the biggest fingers or gloves. The LCD screen glows green (which I love, not blue like the R4) and is correctly viewed from only one orientation. The backlight automatically turns on when the lights get low and the screen is always readable in full sunlight. I cut to size a smartphone screen protector film to protect the screen from any scratches.
The unit is really made to use in one direction with the preamp knobs on the TOP of the unit. The screen indicates which button to press with small directional arrows. Longer presses are indicated with a double arrow. For this review I will refer to the unit in this orientation.
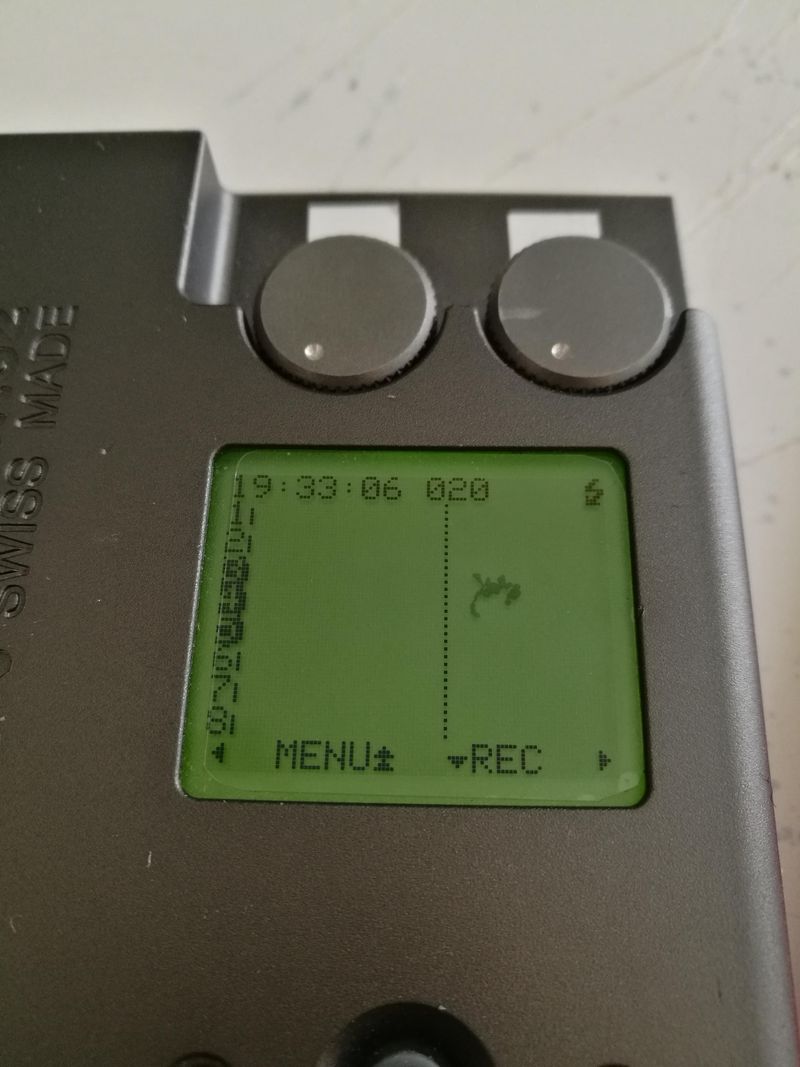
The correct orientation. Long presses are indicated with double arrow, so to access the menu press and hold the 'Top' button
The form factor is a unique one being in a horizontal configuration rather than a vertical one like most of today’s recorders. I feel that this form factor is still way ahead of its time with the industry still not catching on to notice the advantages of such a form factor especially in a sound bag (See my Bag section).
One thing Sonosax could update would be that the user could rotate the screen so that 'Up' would be any orientation they choose. The button orientation would also follow the orientation of the screen. As of now, I am using it in a horizontal position and have trained myself to navigate the menus with the text and meters turned 90 degrees. The ability to rotate the menus would be ergonomically convenient and also aesthetically in keeping with the design. With the screen rotated 90 degrees counterclockwise, the meters and menus would be parallel with the engraved logo. The buttons would also follow the orientation of the screen when turned.
The screen suffers from the same 'beauty mark' that I have seen on some other R4 units. It kind of sucked when I first saw it. I hadn't even used it for a few weeks and it just appeared. I think it got a little bigger since then but hasn't grown since. It doesn't affect the performance, it's just a little annoying to look at.
The buttons have a beveled recess around them so that they can be flush with the unit. While this looks great, it seems like a dust and debris collector in the long run. On my 744t the squishy buttons began to intermittently work after two years possibly because the contacts were dirty or somehow just stopped working. However, one thing I didn’t like about the 633 was the ‘snappy’ sounding buttons and the squishy buttons of the R82 are a much quieter solution. A silent weatherproof button would be an ideal option.
Sides
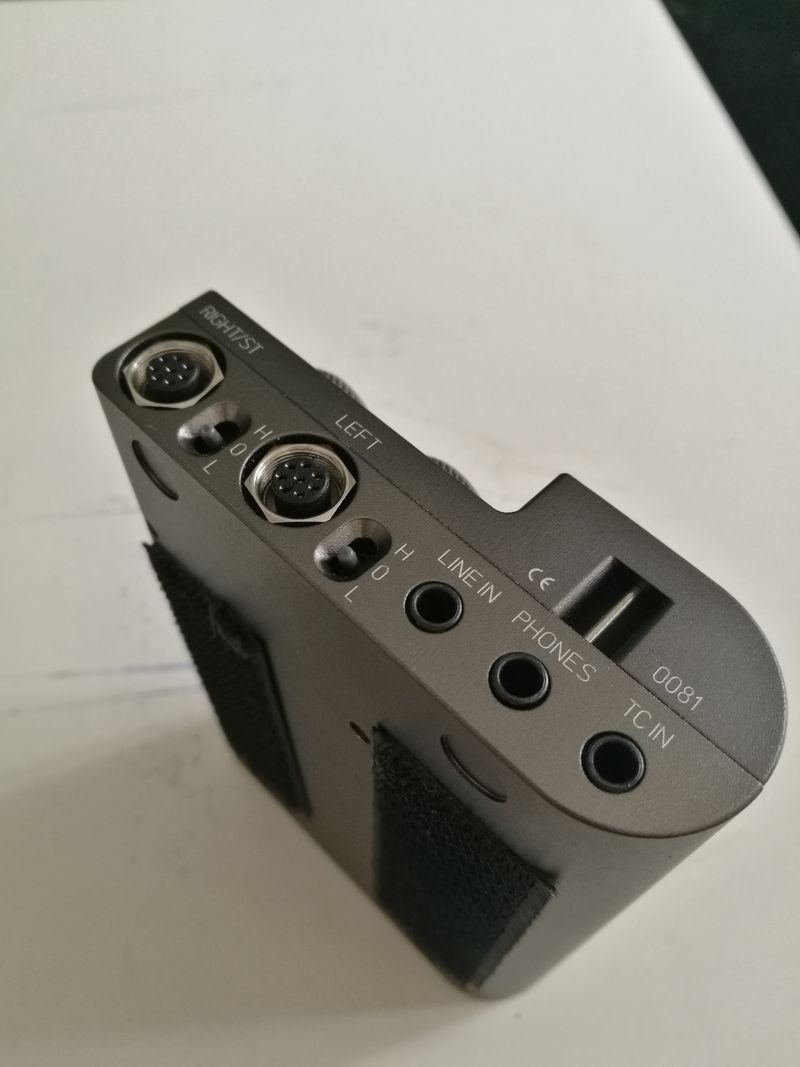
Top side. Only 80 other people in the WORLD have this recorder!
The top side panel is the 'business' end of the unit and has all your ‘small recorder’ connections- Timecode in, stereo line-in, monitor out are all on 3.5mm trs jacks. Two really small gain switches flank the analog inputs which are on VERY secure Binder connectors for the preamps which I absolutely love. I make my own cables and while it requires some fine soldering skills, the assembly of the Binder connector is foolproof and logical. It’s a beautiful piece of engineering. You can also attach a lanyard or similar here.
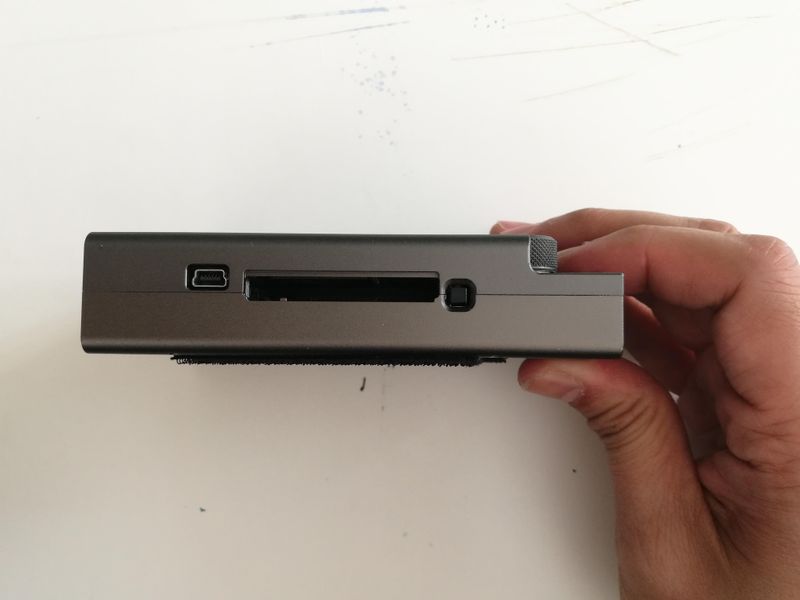
Right side
The right side has an open CF card slot, eject button, and a USB B outlet.
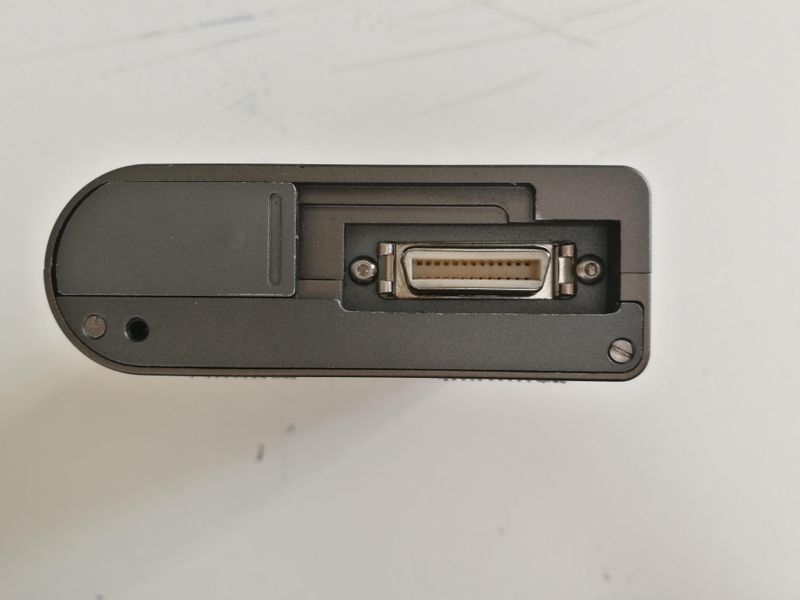
Bottom side
The bottom side has a DC input, multipin interface, and the battery compartment sliding door.
...
Ok! Let’s get into the hardware specifics:
Inputs
There are some minor issues about the inputs that I have to live with but so far it hasn’t caused any problems. First the preamps are beautiful in keeping with the sound quality of Sonosax products but there is a learning curve on the gain structure that is in the form of a three-way switch beside the input connector with the center being ‘0’, the bottom ‘L’, and top ‘H’. The switches are not easy to get to when you have both of the Binder connectors in and I just barely fit. Luckily you don't really have to touch the gain switches too often. ‘L’ covers most of the kind of production recordings you will get on location but it did feel a little limiting. The ‘sweet spot’ was pushing the upper end of the fader and I wish that the gain parameters were a little wider in both directions.. The ‘H’ setting gives you more gain for quieter recordings but at the price of more preamp noise. The ‘0’ setting is even quieter but at the sacrifice of any high frequencies it seems. What’s more, the ‘0’, ‘L’ ‘H’ settings are kind of confusing because if you put the preamp on ‘0’ (which I assume is ‘off’?), and you turn the fader all the way down, it does not mute the input and you will still get a faint signal into the machine. The only way to not get any signal is to turn off the input in the routing menu or disconnect the mic. I get it though, if you don't need it, take it out. Minimal, remember?
The digital inputs are input via the multipin connector in the bottom of the unit. With the appropriate connector, you can easily use this directly with another 8 track digital recorder, digital mixer, 1 or 2 SD552 , or your favorite analog mixer with 1or 2 AJA ADA4 boxes which should also be able to be powered by 5v USB powerbank (untested). The possibilities are endless!
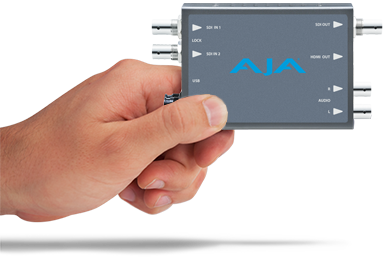
AJA ADA4 AD/DA 4 channel audio convertor
I use one analog input for my boom and the other analog input for a third wireless.
I used to use a wireless boom but the kind of work I regularly do or that I want to do did not justify the cost and weight. I rarely use a boom op so the mic is only really about 3 meters max from the recorder. If on some rare occasion I do need some help booming, I just have a longer XLR in my box. So I made a cable the same length as my arm to go to the Ktek pole with internal cabling. It's more reliable, and I am using the famous Sonosax preamps and limiters for my front end which is what I paid for, and not the Lectrosonics preamps for my boom mic. Minimal, remember?
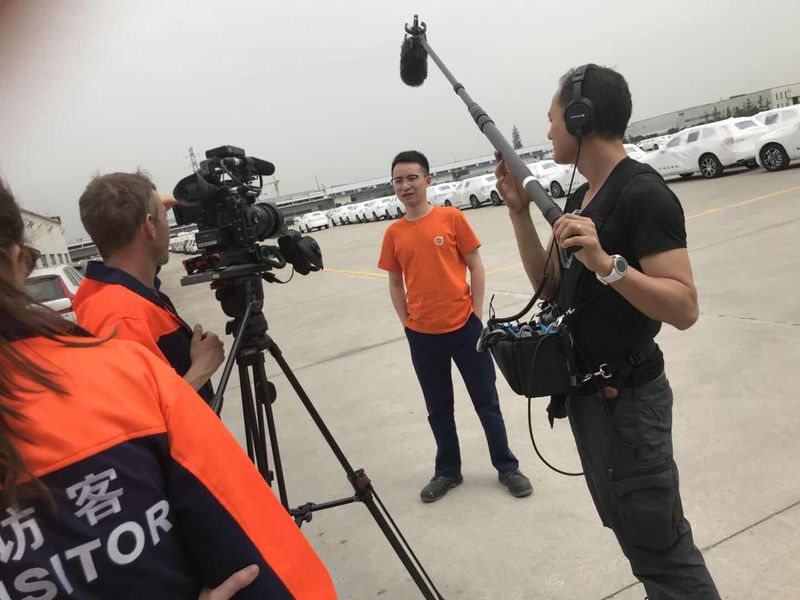
Filming with wired boom pole. No tangle-prone coiled cable for me
Line Inputs
The line inputs are exclusively for my 2 main wireless. I use a Cable Techniques Emergency RX 2 passive faders (discontinued) to control the level of my Lectro LR to the R82. This box requires no battery and is very handy, precise, and quiet. The thing with passive faders is that because there is no power, what you get in you get out- there is no boosting the gain on your audio if you need it. I found that with +5 gain on the receiver, I would usually mix at around ¾ of the way up on the fader which is a nice amount of headroom, though I would like more.
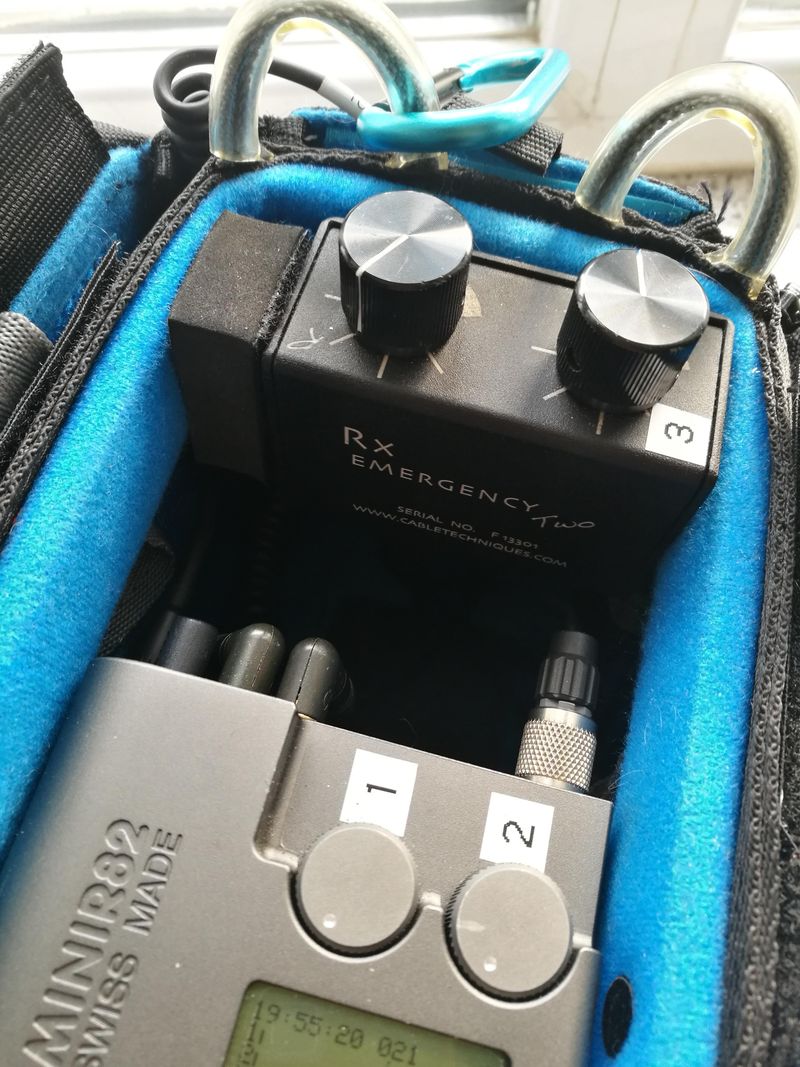
Cable Techniques Emergency RX2 (Discontinued)
The other alternative that provides adjustable gain is the Mozegear CaPre. Which is probably what I will get for a future upgrade.
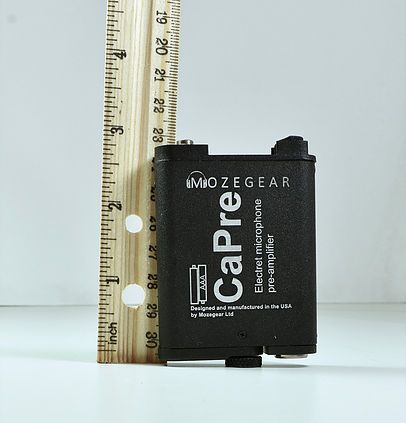
Power
One of the things in my old bag that contributed to its weight was batteries. Even with an NP1 (plus Sony NP-F750 for backup power in the 633) powering my entire bag, it was a ~1+kg that I really wanted to get rid of. When I saw that the power adapter supplied 5v which is the same as a USB power bank, I immediately wrote Sonosax about the possibility for powering the unit with a small USB battery pack. Pierre @ Sonosax confirmed to me that a USB battery pack can be used to power the unit:
"The MINIR82 draws about 1 to max 2 Watts depending on configuration, which means about 0,4Amp under 5V. Thus a USB power bank could power the MINIR82, providing you have the correct DC cable."
So I ordered two adapter plugs from Sonosax with open ends that I spliced with a USB cable that I cut. No more, heavy and expensive NP1 or Sony batteries! One thin 5000mah battery lasts OVER 8 hours without powering the unit off. The usb battery I am using is 120 grams. This was very forward-thinking as only now, you begin to see professional units able to be powered with USB power banks (Tascam, SD, etc). I have seen the same DC input plug on some consumer devices and although it is very slim, if feels very secure when you plug it in.
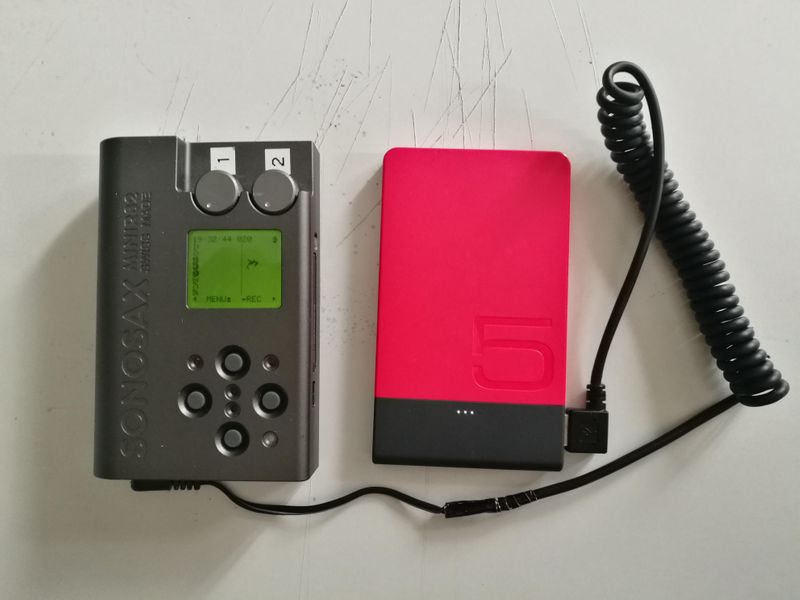
Sonosax power cable spliced with a right angle usb coiled cable
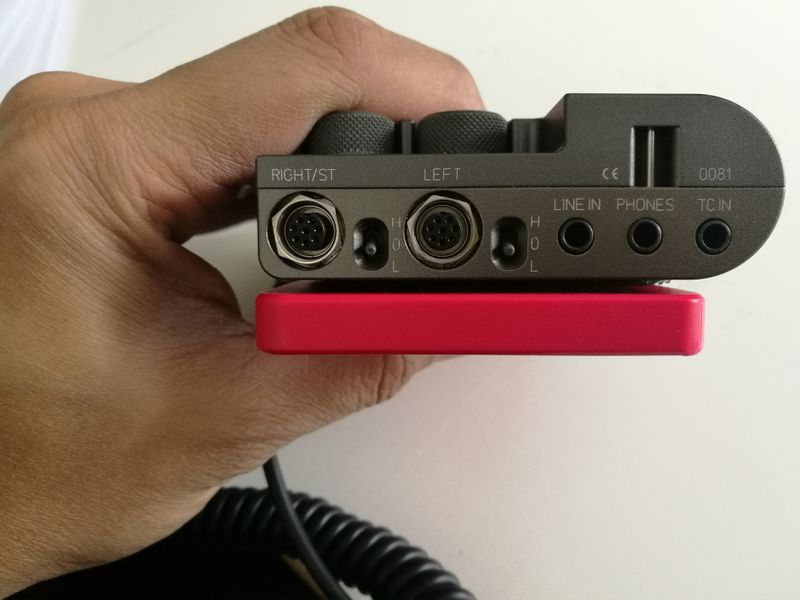
Thin and light 5000mah powerbank lasts about 8+ hours powering two mics and recording 4 tracks.
The unit can also be powered by 4 AA batteries. I use rechargeable lithium batteries that are about 50% the weight of my NiMH batteries and last the same amount of time or longer. The rechargeable lithium batteries last about 4-5+ hours in the R82. In the end however, I just stopped using AAs in the unit to lessen the weight.
Unfortunately, if you lose power in the middle of a recording, the entire last file is lost. Would be great to have an incremental save every few seconds or minute just in case power suddenly is lost. Yes, this did happen to me once when the documentary shoot was running a little over time and at the limit of my battery. Would be nice to have this parachute in a software upgrade. Be sure to get the powerbank with lights indicating the amount of power you have left as you will need to rely on it to know your battery level.
If the external power gets disconnected in the middle of a recording, it will automatically switch to batteries with no interruptions.
One compromise about the small form factor is that you need to remove the multipin connector if you want to replace the batteries. The battery door is metal and does not stay closed if you do not have any batteries in the unit. Also, one interesting attention to detail by Sonosax is that the battery door will not slide closed if you incorrectly install any of the batteries.
Media
The newer units have an SSD already installed as well as a CF card on the side. I really like using CF cards because it is a more robust media than SD card (be sure to carry a reader with you). The unit came with a CF card SD adapter for convenience, but I just use a proper CF card. One thing you have to keep in mind if you are recording in less than ideal environments is that debris can easily go in from this slot, so tape it up if you are going to dusty environments. In the Congo, we were recording at a beach and at the end of the day, I saw some fine sand just inside the CF card opening.
I have been using a Sandisk Extreme 32GB without any problems.

Riverside beach location in the Congo. Tape up the openings at the beach!
Monitoring and outputs
There are a few workarounds that need to be done to use this as a typical bag recorder. It took a lot of planning to come up with a simple solution, but it can be done! Here’s how I did it:
Unfortunately the unit does not have independent output controls for a separate camera send. The only outputs of the recorder are the headphone output and another pair via the multipin connector. The catch is that both of the outputs are controlled by the overall volume of the unit. This means that if you start changing the volume in your headphones, you will also change the volume in your camera sends which is not desirable since they are already calibrated with the camera. Sonosax said that this was a result of the small form factor and there simply was no space to include another output amp in the board at the time.
My initial solution was simply to add a small headphone amplifier to the headphone outputs. This allowed me to adjust my personal monitor volume without touching the volume of the unit (which affects the camera sends). In the end however, I discovered that I didn’t need to use a headphone amp as my preferred listening volume provided sufficient signal to the transmitter which is 0dB on the unit. Now I do not need the headphone amp at all. When I thought about it more, I realized that I very rarely adjust the headphone volume when I record and that it stays at the same gain pretty much all the time.
The multipin connector monitor outputs are what feed my IFB and camera sends. I custom made my multipin to have male TAF3 connectors for both left and right outputs. This allows me to make ‘dongles’ to connect to any transmitter or connector as needed. This makes it very flexible and without the added weight of more XLR connectors in my bag. See my Cabling list below to get an idea of what I have in my kit.
Calibration
The R82 does not have a tone generator to calibrate with the camera. My solution was to use the LR’s tone generator to input the signal to the R82. I then adjust the fader to -20 on the meters and calibrate it as needed on the camera inputs. Easy, precise. Here are the steps:
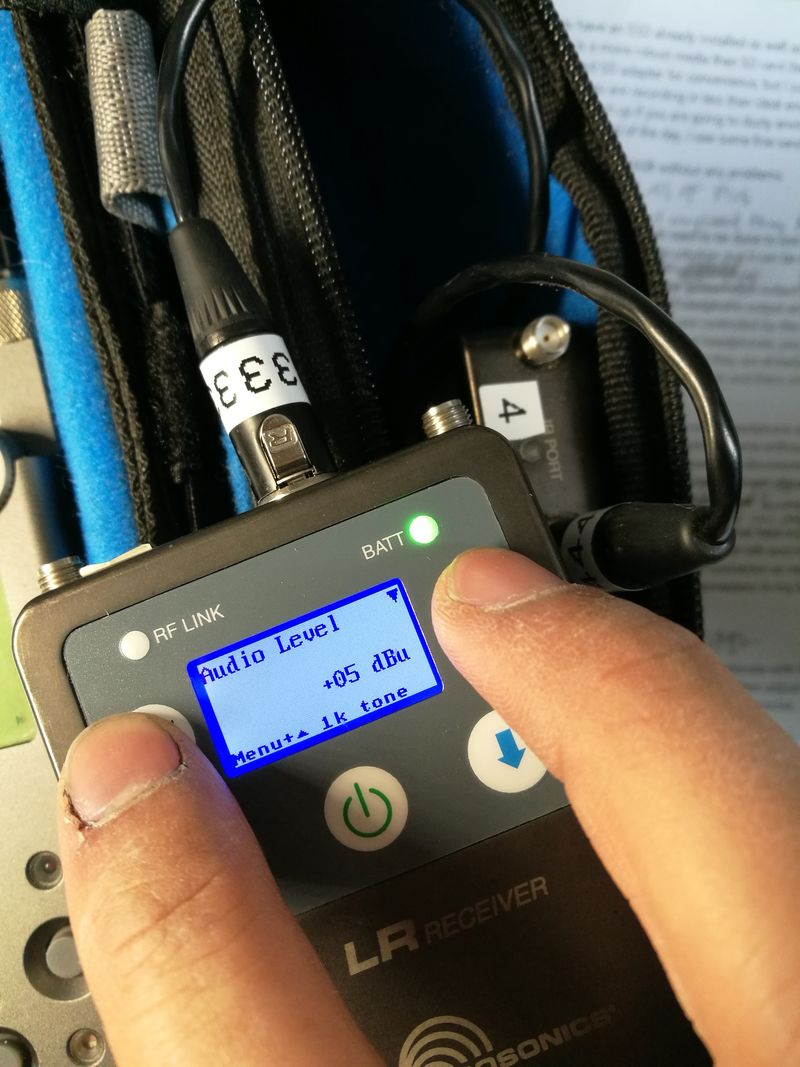
Start the tone on your Lectrosonics receiver
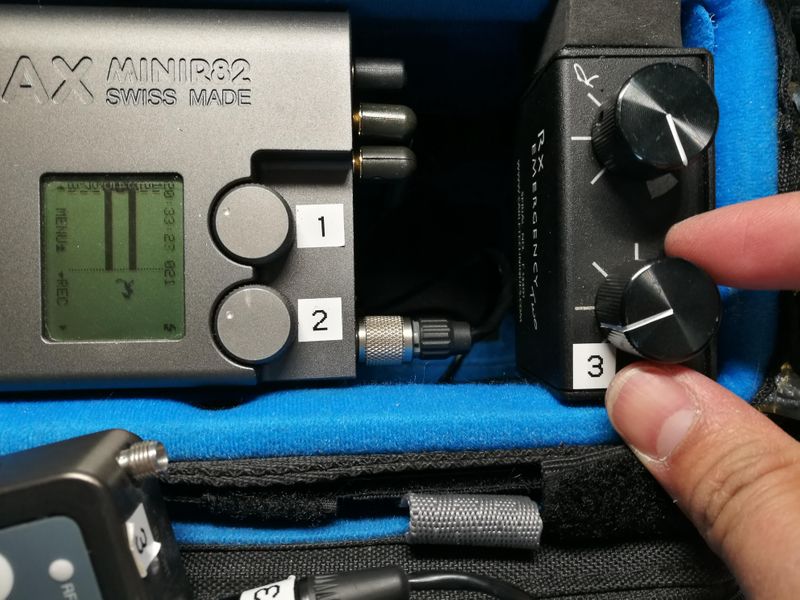
Raise the level of the input so that it reaches the -20dB line on the recorder
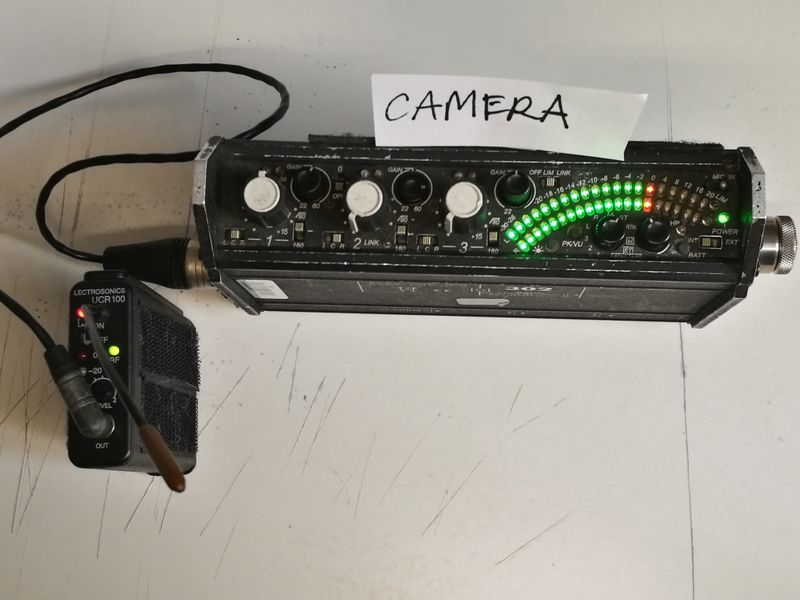
Calibrate the levels on your camera. Done!
Too hot to handle
In 2017, I went on a shoot in the Congo for 1 week and while the highest temperatures were around 36-38+ it was still bearable. The R82 with two phantom powered mics, however, could not take it. The unit was super hot to the touch and the screen filled with a bunch of mumbo jumbo code (see pic) and none of the buttons worked. I had to disconnect all the power for it to turn off and had to wait until the unit was at a cooler temperature in the shade for it to even turn on. Luckily this only took a few minutes as the metal body serves as an efficient heatsink. This happened several times because we were in a place with no shade that day but luckily, I was able to get some black paper and cardboard from the gaffer and taped it to the raincover and didn’t have any problems from then on. I couldn’t see the screen for the levels but at least I didn’t have an overheating problem after that. I have since made a blackout cover that I can attach to my bag in case I am in a very hot environment.
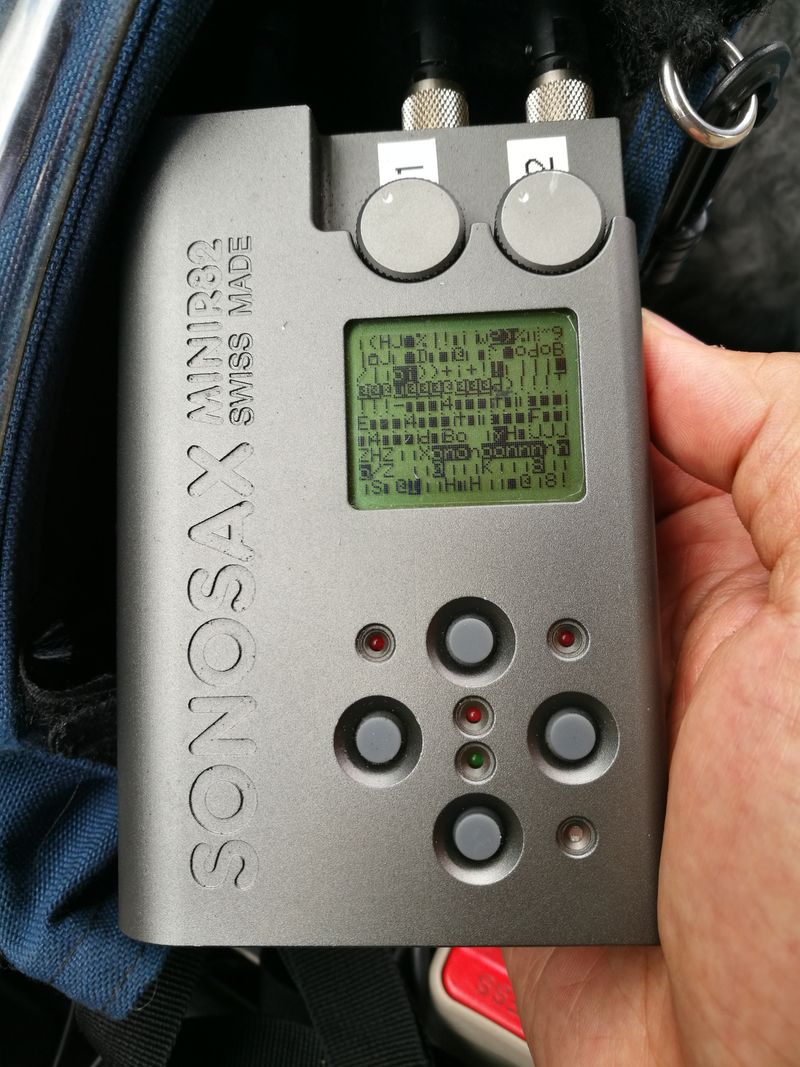
Overheat mumbo jumbo
One thing that may contribute to the overheating issue is that the LCD screen backlight is always on. I recently went on a recording excursion in the summer and put it in a Portabrace bag made for a 302. The R82 was placed vertically in the bag but because the light-sensitive eye is covered while in the bag, the LCD was at its brightest thinking it was in a darker environment. Perhaps if the backlight could be toggled on or off, this would lessen the heat.
Ultimately, I feel that the main culprit of the overheating is probably that the SSD is generating a lot of heat while running. These drives can get pretty hot and require adequate heat sinking and/or airflow. Get rid of it and replace it with a second SD or CF card slot for a lighter, thinner recorder.
I have yet to try the R82 in extreme cold.
Expansion
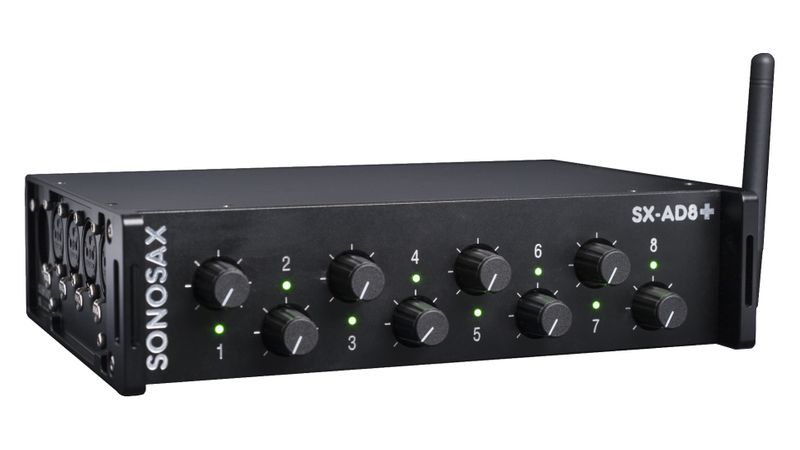
Sonosax AD8+. Possible expansion?
Though it is not documented, I don’t see why the R82 cannot be interfaced with the SX-AD8+ via the Multipin input. It would input 8 digital tracks to the R82 and the ability to meter it from an external device like an ipad etc, via the wifi feature. The multipin input will need to be a little bit customized a bit in order to preserve the monitor outs (on the R82 end) but in theory it is definitely doable. This might be a pretty cool and super compact upgrade path for the future.
Also, as I said before, using the AJA ADA4 boxes can help connect all your existing equipment to the unit.
Software
The software is pretty basic and self-explanatory and has the odd quirk but once you get used to the workflow at the beginning of every day, it becomes second nature. The manual covers all aspects of the menu system but you never really get to understand it until you get your hands on the unit. I will talk about some special features and quirks that I have found while using this unit. For this review, I am using the latest version: 4.4.
A long press of the ‘UP’ button gets you to the internal menu.
Input routing matrix
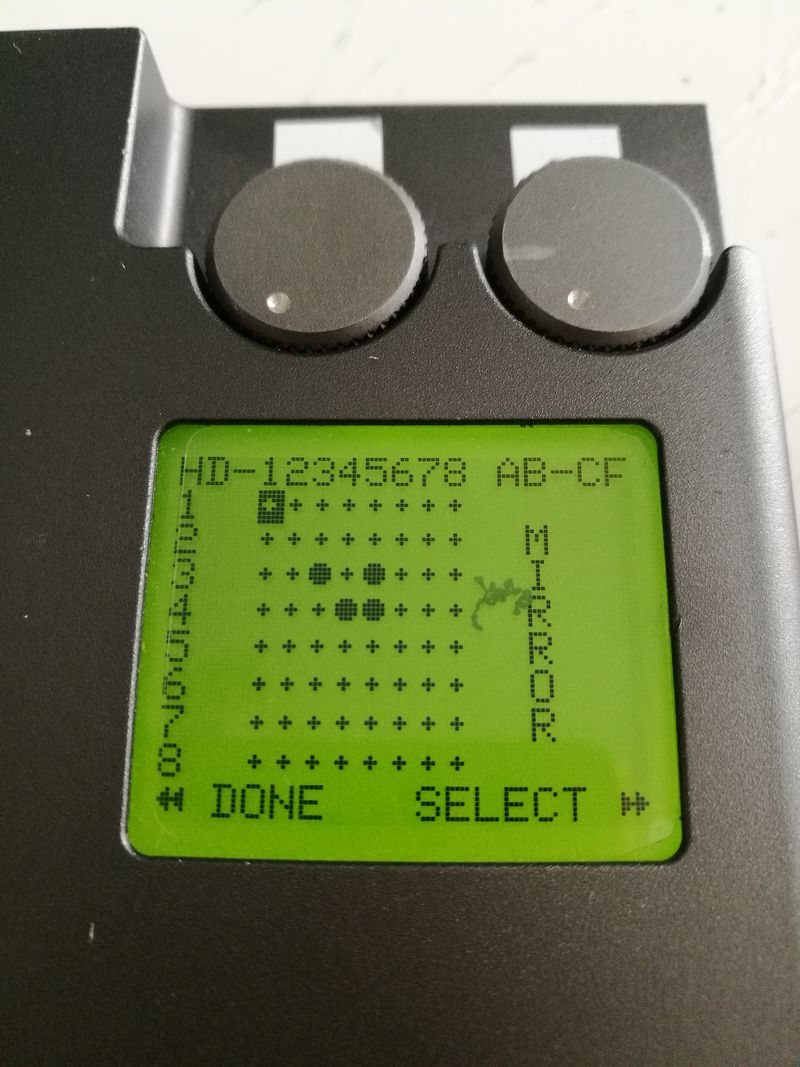
Input routing matrix. This shows inputs 3,4 are being recorded to tracks 3,4 but also to track 5. They are also being mixed 'mirrored' to two tracks on the CF card where odd # tracks are Track 'A' and even # tracks are 'B'
The input routing is in a SD 7-series kind of matrix where you can record any input or combination to any track. My typical setup is to record the inputs to their corresponding tracks (channel 1 to track 1, etc.) and then also to track 5 for a mono mix of all inputs. Just like the 7-series, this is a true recorder and there are no ‘true’ iso tracks as each track is post fader so any fader adjustments will affect the program on the track. If you need any of these features get a mixer.
The CF card can record a ‘mirror’ mixdown of all the tracks or a separate 'Left-Right' combination of tracks of your choosing. I usually use the ‘mirroring’ option. The only reason I would change to Left-Right is if I had a complex output routing scheme, for example if I wanted to send different mixes to the camera and IFB- which is the only way to achieve this.
I have not tried recording with the digital inputs yet.
Monitor matrix
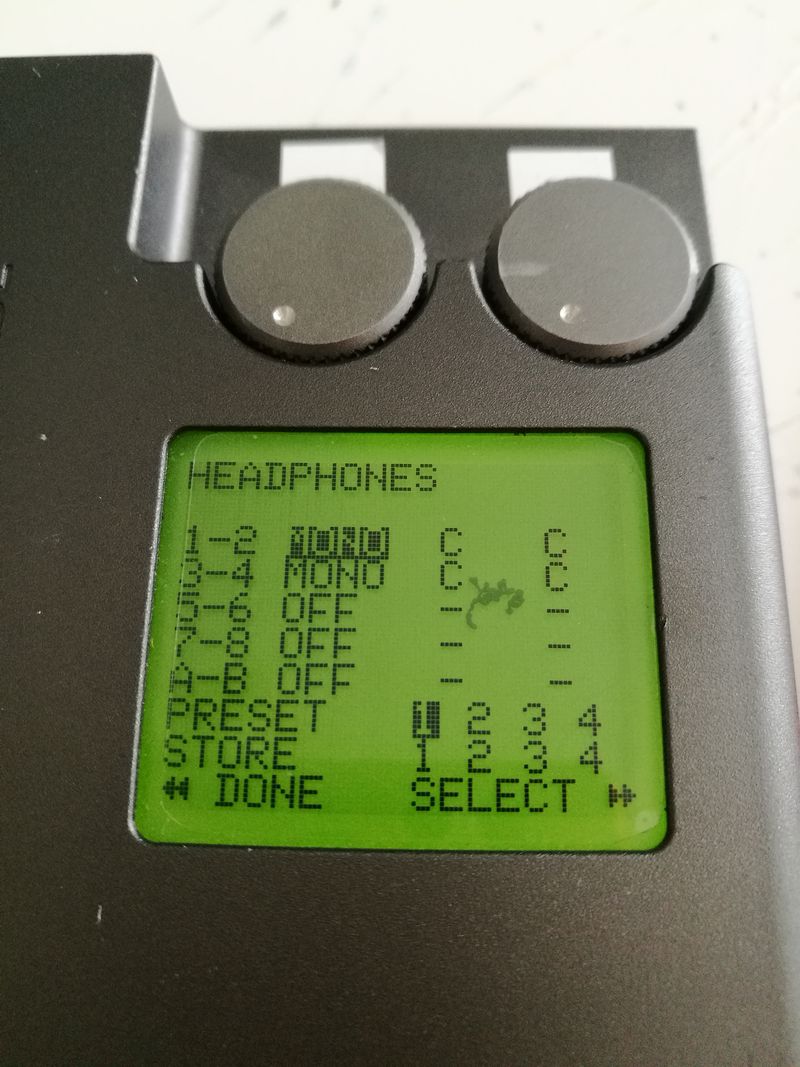
Monitor matrix. Select how you want to hear your audio
The monitor matrix is a menu that allows you to configure any monitor combination with any input. As the outputs are the same as your monitor outs, this matrix also controls your output routings. You can also save up to 4 user configurations for your typical requirements.
On quirk I found was that if I monitor track 5 (sum of all tracks) I can sometimes hear some digital ‘noise’ from the unit, like background beeps, timecode, and something like processing noise when recording and idle). This noise is not recorded, but since the monitor output is also your camera send/ IFB, everyone down the line can hear this noise. One workaround was to monitor the tracks 1-4 directly as mono and not the mixdown on track 5. Another workaround was to restart the device. (Note: This electrical noise is intermittent. Sometimes it is inaudible, other times it is audible)
Date and time
The unit keeps the date and time for about 2 hours after the batteries are removed. After this, everything just stops. The internal clock is not too accurate that by the end of the day, it is minutes ahead or behind my Lockit time as well as the clock from internet. So using an external TC is really the best option.
Be very sure you check your date and time before every workday and if you have removed the batteries from the unit for an extended period of time.
Also, even if the unit is off, I think that the unit still pulls power from your batteries in order to keep the time and date. Be sure to unplug or take out the batteries at the end of the day otherwise the next morning you may be low or out of power.
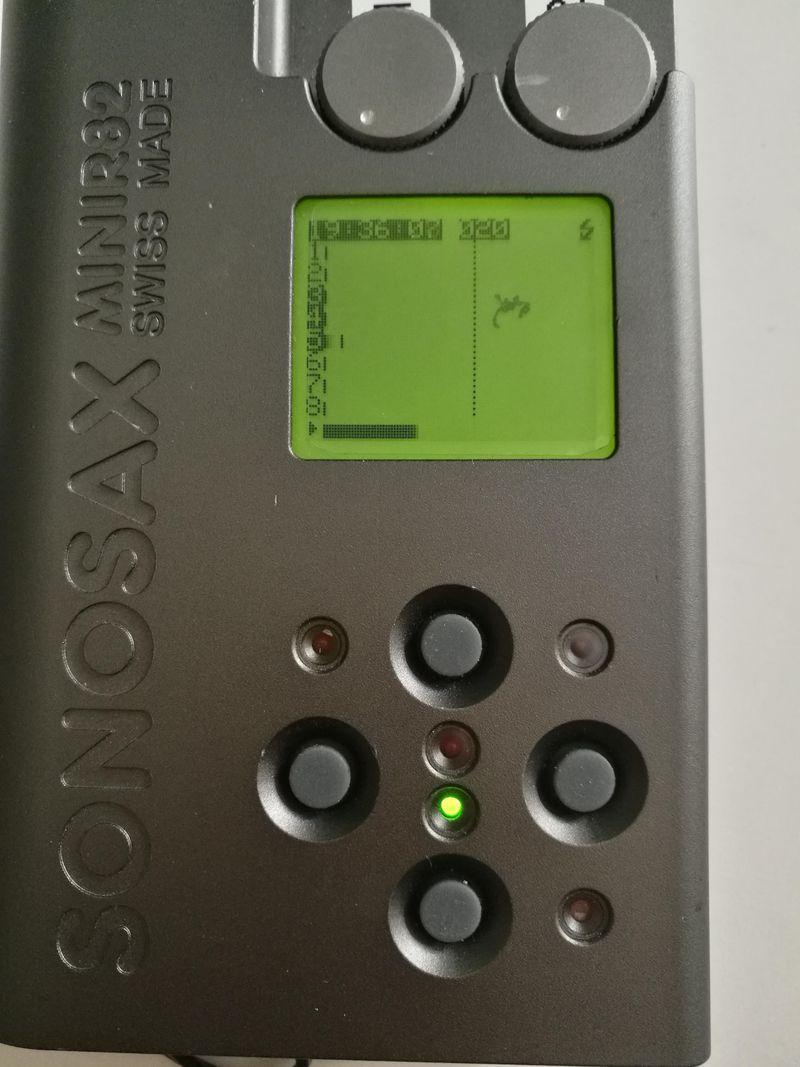
The two faces of the R82- Playback and Record
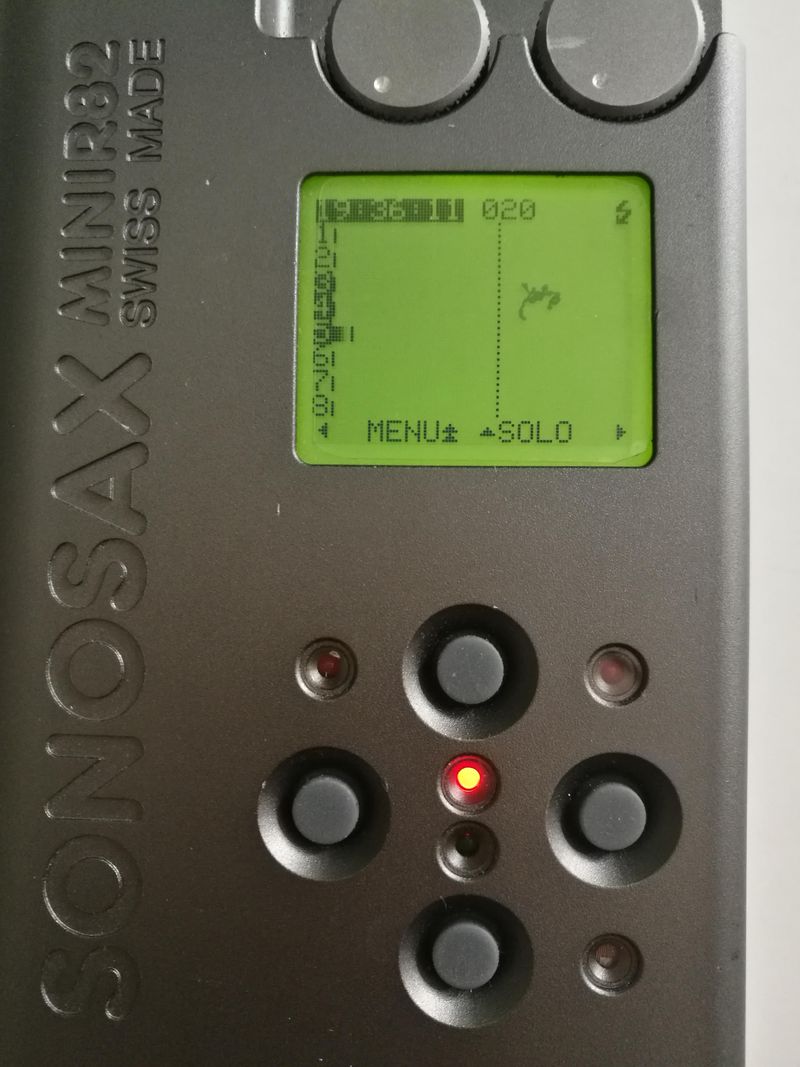
Record. The highlighted tracks are record-enabled
Playback
Think of the R82 as having split personalities- One is record and the other is playback. When the unit is in the record mode, the red record light blinks. When in playback mode, a green LED is present indicating that you are in playback. Switching between the two modes is done in the menu. Which can be accessed with a long press of the ‘up’ button. The options at the bottom of the LCD change depending on which mode you are in and there are arrows that show which button to press for each action.
The manual is pretty detailed with all the commands, so I will just talk about a few things that are unique or could be better.
Solo Mode
You can solo individual tracks by pressing the ‘UP’ button at anytime, and then scrolling through the tracks with the up/down buttons. You can solo while you are recording or stopped.
One quirk of solo mode is that you cannot start a recording while in solo mode. You can stop a recording in solo mode but not start one. You need to first exit solo mode (long press ‘up’, then 'right') then press record (short press ‘down’) to begin recording. This could lead to a missed opportunity when you need to press record in a moment’s notice.
One thing to remember is that soloing tracks will also change what is sending to the camera/ IFB so you should only solo during playback or when not recording. Mute or turn off your IFB if you do not want anyone to hear the playback.
File Name
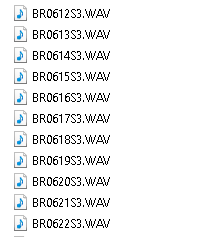
The unit does not allow you to rename the entire filename only the first two characters.
The filename of each file has a two-letter prefix of your choosing and is followed by an incremental sequence, similar to how a digital camera records files. The sequence number cannot be changed as far as I can see, so it shows how many audio files you have recorded since you started using the unit. This is a nice touch so that there can be no confusion because of overlapping track names during your shoot. It does however, require that you create a sound report for post to look at while editing. Usually, if the TC is correct, then it shouldn't be a problem in post, this is really as an added safety measure should the TC be off. It's a little extra time for me after wrap but I usually can just email production later on that night after a nice shower. They won't be done ingesting the camera cards until morning anyway.
As there is no sound report generator in the unit, I use Wave Agent for creating sound reports after each production day.
I wish the filenames could be changed to the scene name to make it easier to find a specific file without looking at the sound report.
Metadata
The metadata can be adjusted via the menu and you can add things such as project name and scene but that’s about it. One quirk I found was that even when a new folder is made at the beginning of the day (the R82 asks this at the beginning of every day to make a new folder), it does not reset the take number and you must manually bring the take counter back to 001 or make a new scene name. This makes sense for overnight shoots that go past 12am in the middle of a scene, but just be sure to adjust this before every new workday.
One convenient thing is that if you change the scene number/name, it will automatically reset the take number to 001. You can also manually specify the take.
I wish there was more data available for metadata editing. In the least, a track naming option should be available in this menu.
My Settings
If you want a list of all my 'Work' and 'Field Recording' user settings, I have uploaded a Word file to my dropbox that you can download and see. This will get you up and running in no time.
You can get the file here:
********
Additional feature Request
Hotkeys/ Key combinations
On such a minimal interface like this, every element needs to be as flexible and versatile as possible. ‘Hot keys’ or ‘hot combinations’ could be a great way to add more functionality by pressing two or three buttons at a time, it could perform certain user-specified or handy shortcut commands, for example: to go straight to monitor or routing matrix, playback, low cut settings, metadata, date/time, etc. This would make things easier than digging through a menu for them. Another way would be to have multiple presses- ie. pressing a button two or three times- to access different functions too.
********
Peripherals
Bag
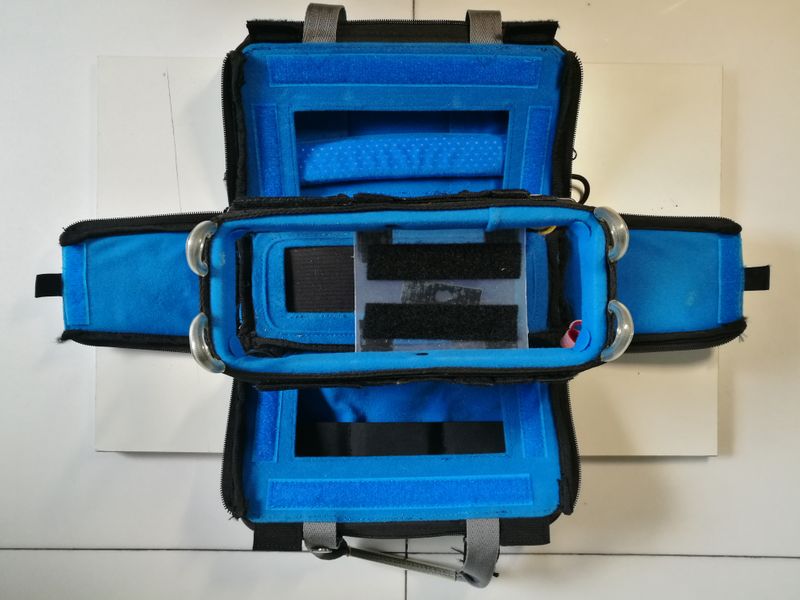
Orca OR-27
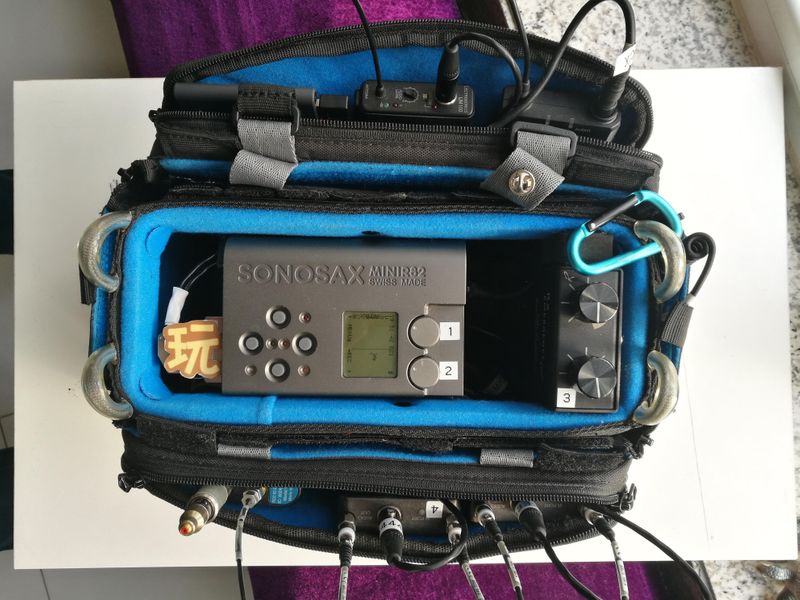
One thing that initially stopped me from getting the R82 8 years ago was the form factor. Back then, no bag was really made for it which made it hard to use. Today, because equipment has gotten smaller, more and more bags for smaller recorders are on the market. The smallest one that fit perfectly was the Orca OR-27. It is their smallest audio bag and yet seems that it was made especially for this recorder and the equipment that goes along with it. Despite the bag being almost half the weight of all the equipment (990g), it’s internal rigid frame really helps support the unit and more. The design of the unit as a horizontal instead of the usual vertical orientation frees up the entire bottom half of the bag allowing transmitters, batteries, lav mount kits, and even an extra mic (compact models) to be carried in one bag. I was amazed how it fit everything I needed.
Routing the wires in the bag was pretty easy. The Orca bags are nice in that all the sides can come down leaving only the frame. I used some Velcro straps to secure the cables to the frame as well as velcro with adhesive backing where needed. The goal was to leave the middle totally free to store a lav kit, microphone, wireless, batteries, etc without snagging on any of the wires when putting them in and taking them out. The 'left' side of the bag is the side for access to the storage below the recorder. The 'right' side has all the wires so that stays closed during the workday.
To mount the recorder in the bag I had to cut a thin piece of firm plastic to make a 'tray' and put some Velcro on it to secure it to the upper frame of the bag. Only using the pads that come with the Orca bag is not a stable solution.
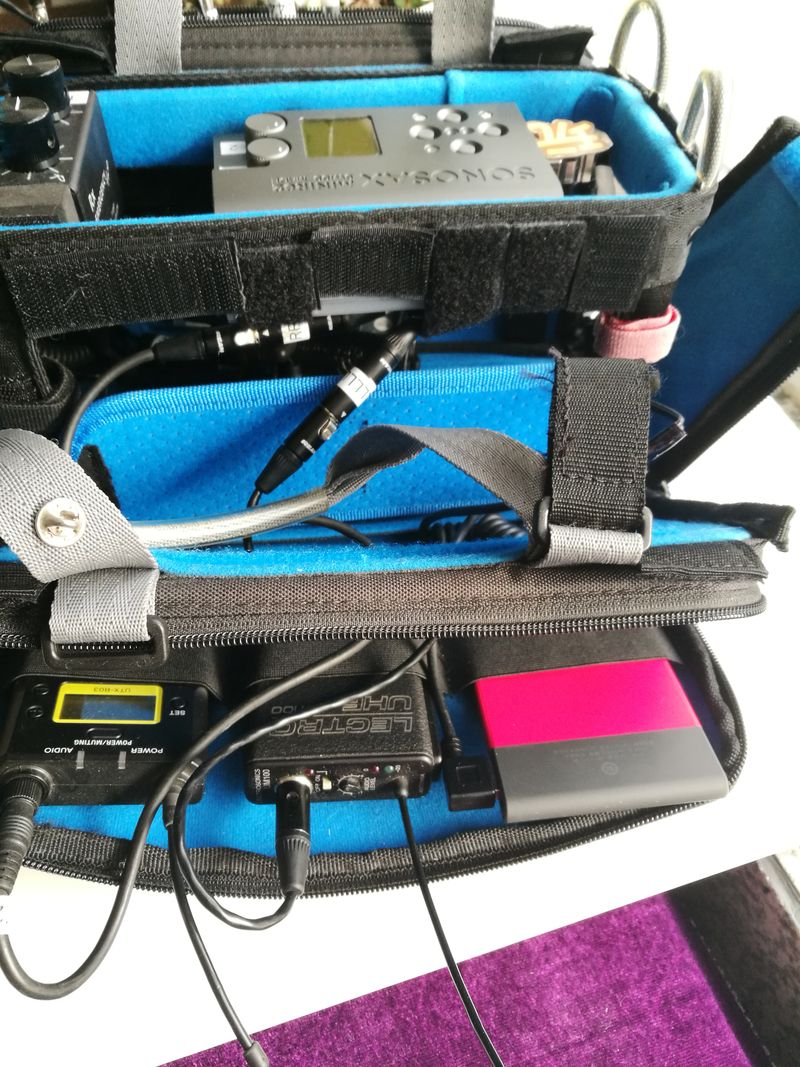
Front pocket has the sends and battery. Velcro is my bestest friend.
Driver's side view. The rear pocket has the wireless receivers
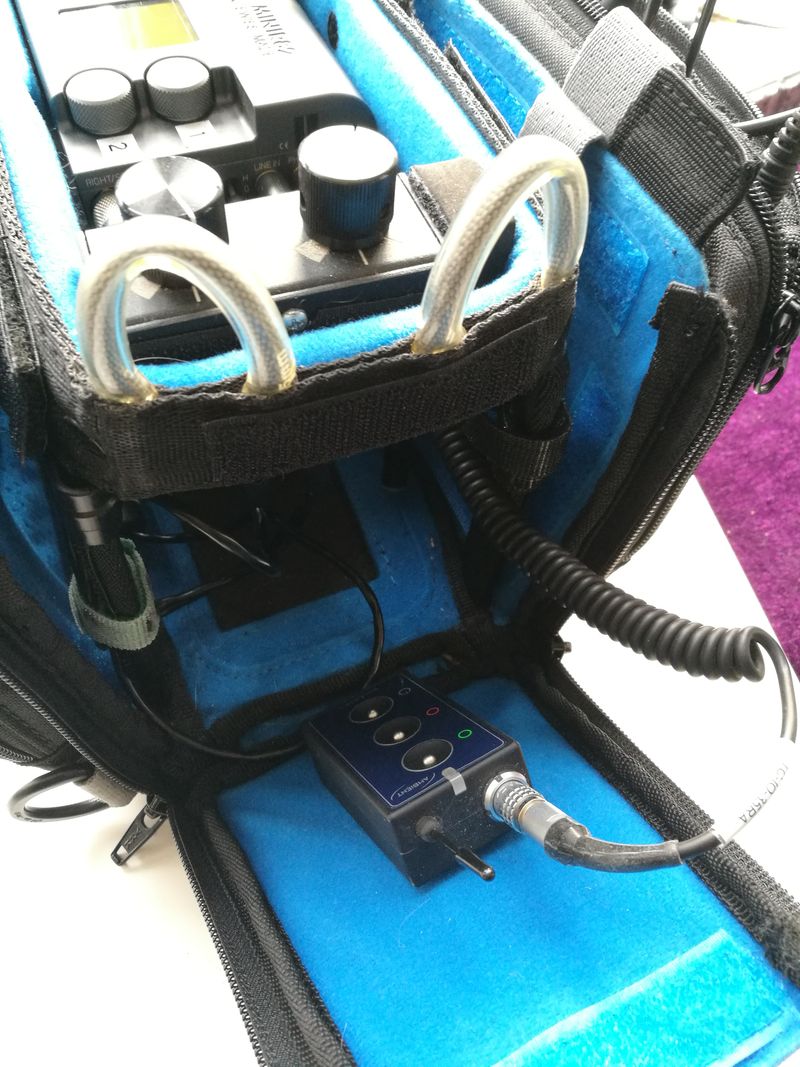
Right flap is only for accessing TC and RX wiring.

Empty interior
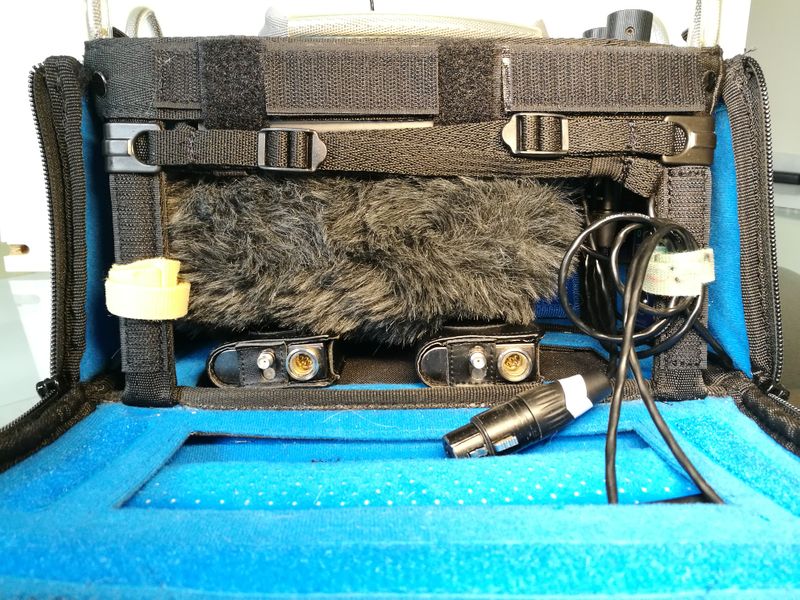
Interior with 2 SM TX, Rycote Softie, and a hypercardioid mic (MKH 8050) (not shown). Still room for one more TX! Access is from the left door only.
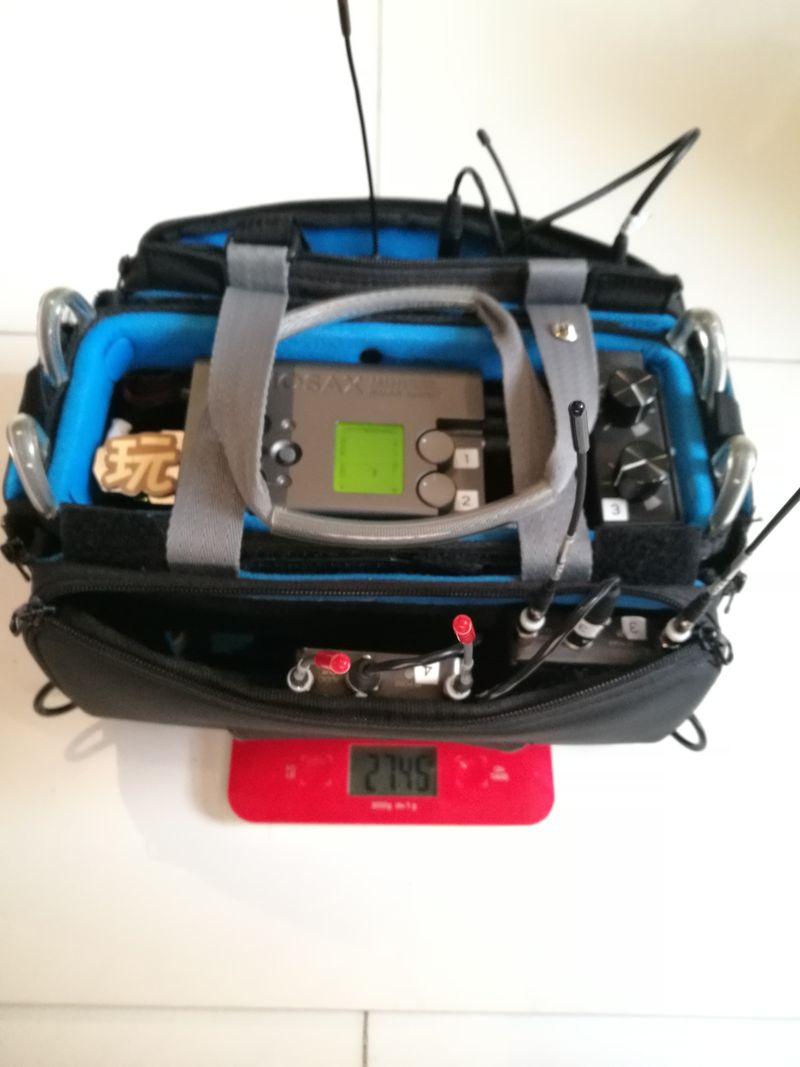
2.7 kg. (including (2) TX)= Happy back
I put my battery, camera send, and IFB in the front pocket and up to 3 wireless receivers in the back pocket. The Timecode and RX wiring could be accessed from the right door. The left door is the side where the storage could be accessed. Under the unit I put two wireless transmitters, hypercardioid mic (MKH 8050- capsule only), maybe a windscreen depending on where we are shooting. My support case is a Pelican 1520 roller and a Ktek boompole case. Limiting myself to these bags directed my equipment choices and really got me thinking about what I really needed for shoots without being too superfluous but also prepared in case the unexpected happens. Even my windscreen had to be cut down to fit (pictures coming soon).
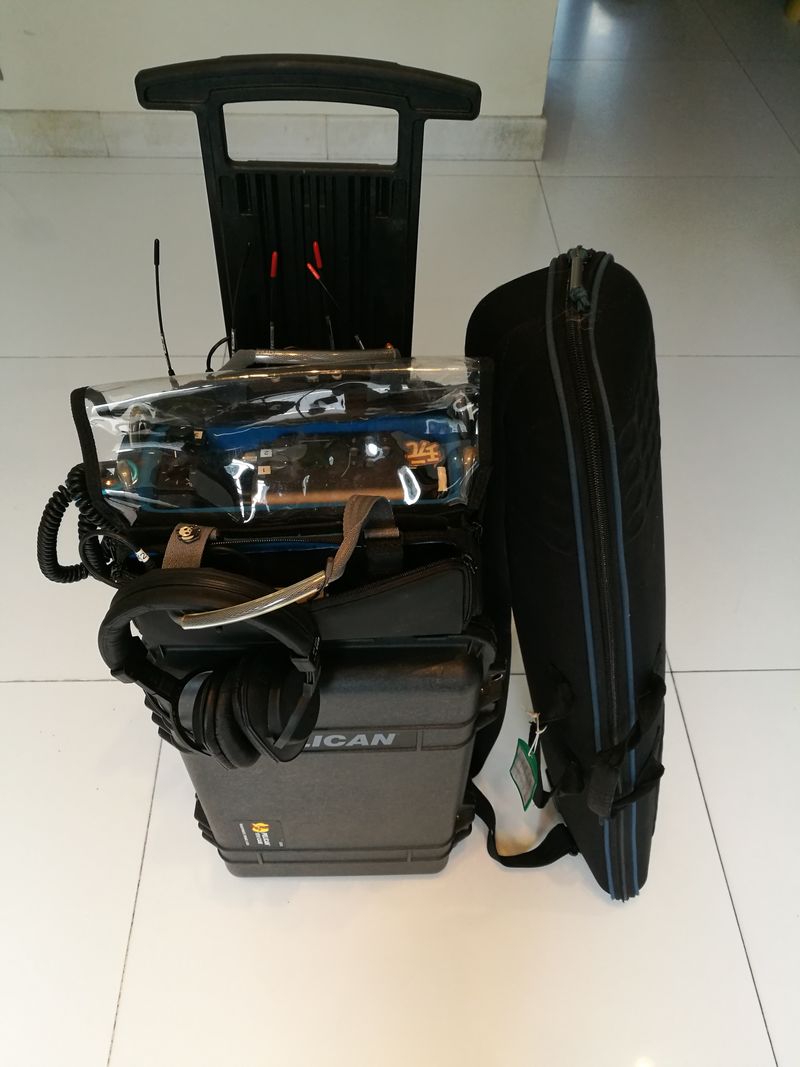
My typcial setup. Everything I need is all here. The Pelican and Ktek case can be checked in and the Orca is carried on.
Since the Orca does not really have space for a lav mic kit I use a separate expandable hip bag connected to the waist strap of my harness. This has all the accouterments I need to mount a lav on the go. If I need more space for another mic or windscreen, I can just add another bag on the other side or around the belt as needed.
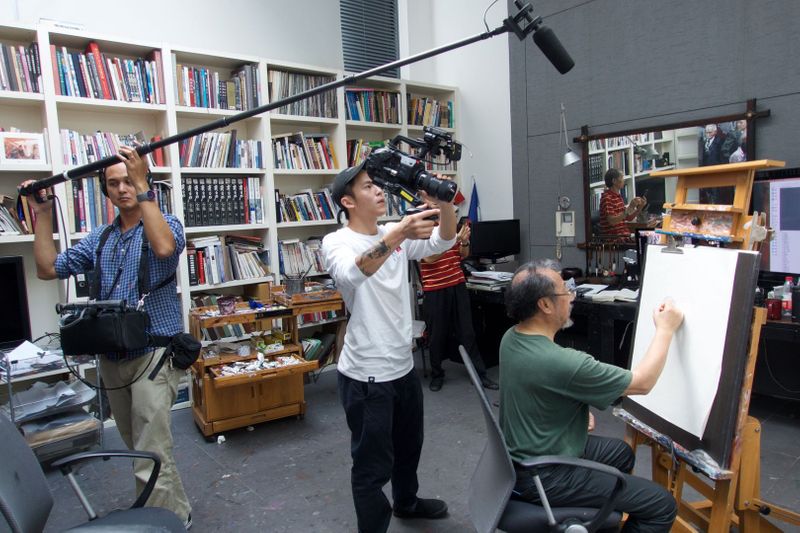
Note the small hip pack on my waist
Cabling
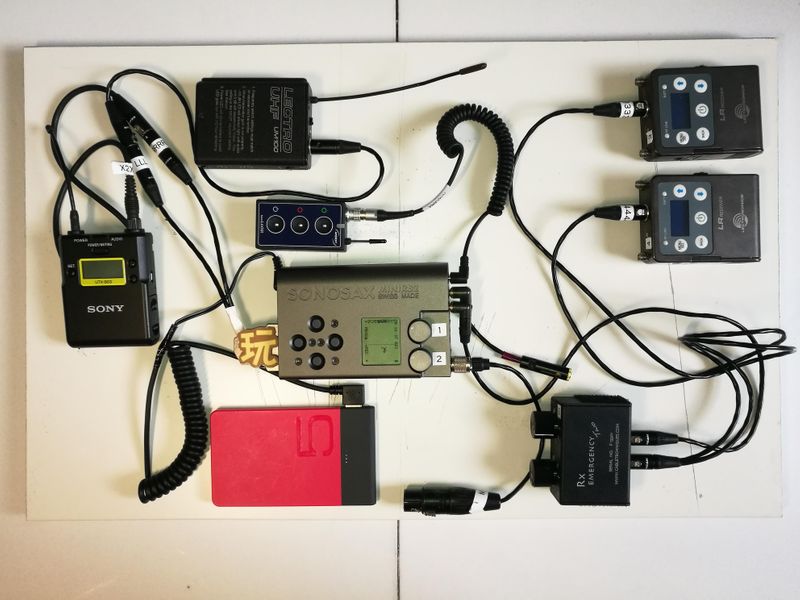
Central nervous system. Everything minus the bag
Basically, all the cables from my 633 were unusable without at least one end of the connectors being replaced. So if you commit to this unit, be ready to warm up that solder wand.
I make my own cables so it was easier for me to experiment and tweak it just right. I made some new ‘adapter’ cables for the multipin output to make things as flexible as possible for any scenario and kind of equipment. Here is the list:
Inputs
(2) Binder Phantom mic to Female XLR
(1) Binder line to Female XLR
(1) Two Binder Phantom Mic to 5 pin xlr Female (For my stereo mic recordings)
(1) 3.5mm to Lemo (came with Nano lockit)
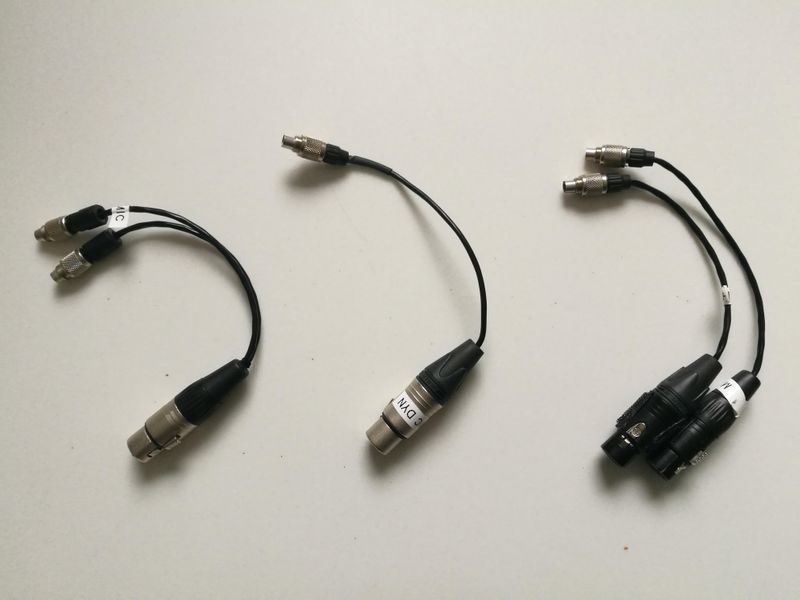
Binder connector cables. The left stereo connector connects to a 5pin XLR. I kind of made this in a different way than is suggested but it still works.
Outputs
(1) 3.5mm Male to 3.5 mm Female for Headphone (This was because there is not enough space in the bag to easily plug into the phones output on the TOP of the unit)
(1) 3.5mm to 3pin mini xlr + (1) 5pin Mini xlr Female to (2) mini 3 pin XLR for Lectro LR (For Cable Techniques RX2)
(1) 3M Multipin connector (from Sonosax, but you can buy these anywhere) With (2) 3pin TA3M male mini XLR for the outputs. This is so that I can make 3pin TA3F Mini female XLR adapter cables with any connector for any brand or kind of equipment or input (ie. IFB, camera hop, XLR, or other audio equipment). This also meant that I could reuse the bastard TA3F cables from my 633.
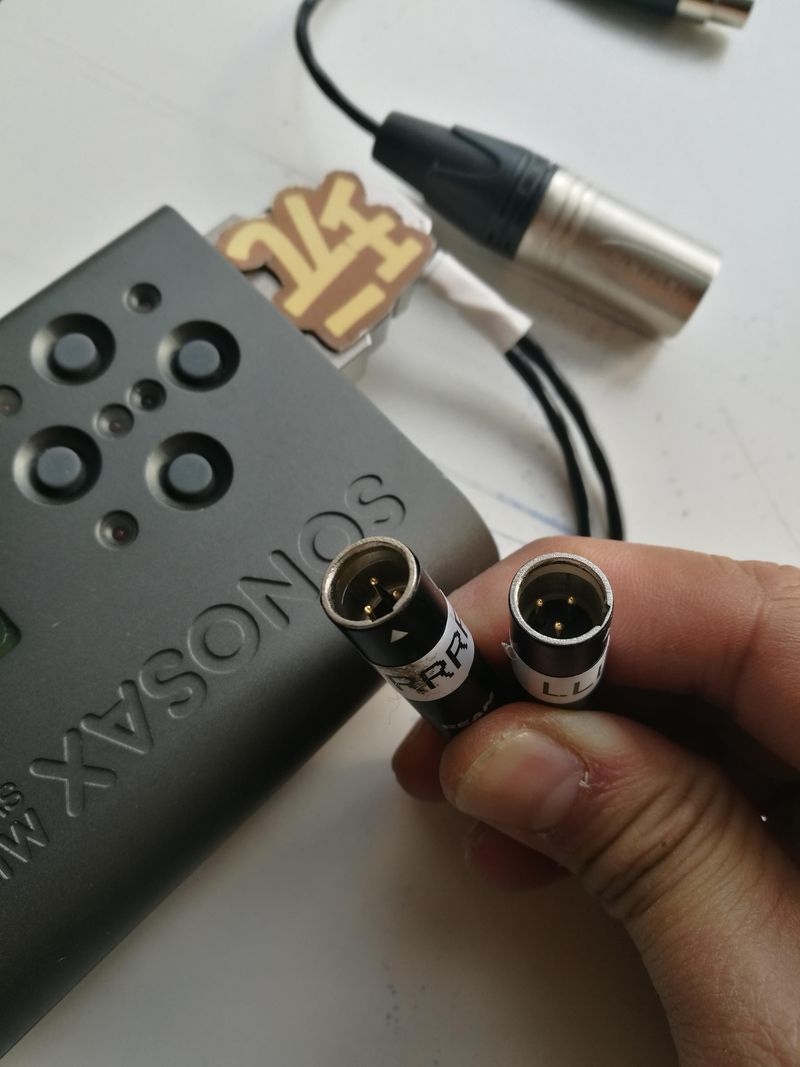
3M multipin connector with my TA3M adapter cable solution
Multipin ‘adapter’ cables (for my current equipment setup)
(3) TA3F to XLR F
(2) TA3F to XLRM
(1) TA3F to TA5F (Lectrosonics camera hop)
(1) TA3F to 3.5 mm TRS (Sony UWP IFB)
One day I will make another set of these cables for safety.
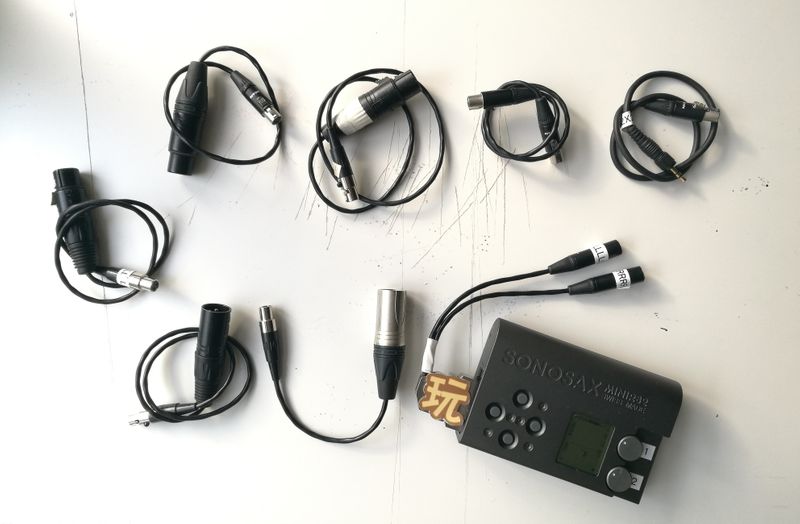
The TA3F adapter cables for my current setup
Conclusion
The mini R82 is a recorder that is in some aspects still ahead of its time. It can be completely at home in any size production and although some of the convenient features that have become expected on modern production recorders are not included in the R82, one is not distracted on the thing that matters the most- the audio. The software quirks are relatively easy to get used to but unfortunately, the hardware quirks are just something we have to live with. To most, this unit will be too much of a compromise from what they are used to than what is on offer from newer units of comparable price. Not to mention the cost of making new cables just to make this unit bag usable is another thing that should be considered. If there was a newer version in the works that could justify all this or have a starter kit of cables, perhaps it could make the initial costs easier to stomach.
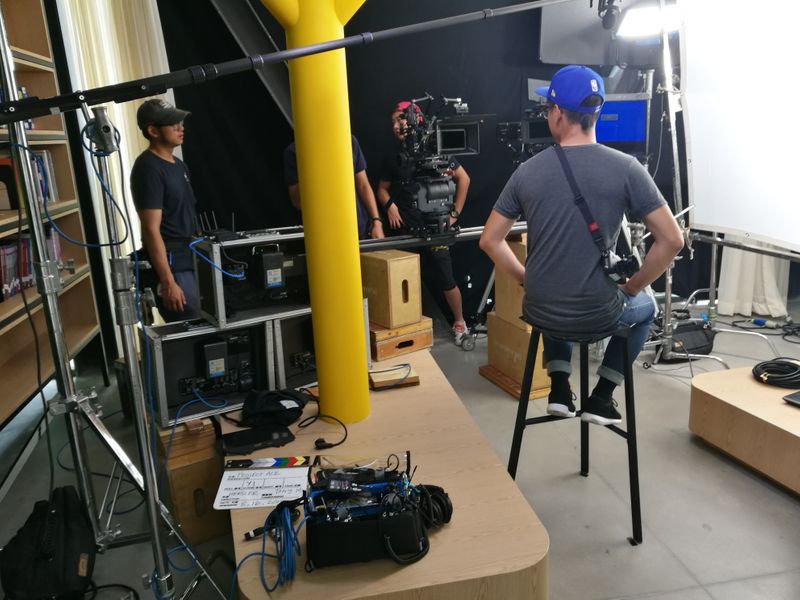
On location
The overheating issue really was a shock and something I had not seen with my years of using Sound Devices recorders in all conditions. I think it is the hard drive that is within the unit. Perhaps if the hard drive were removed it would solve this problem, not to mention make an even lighter unit.
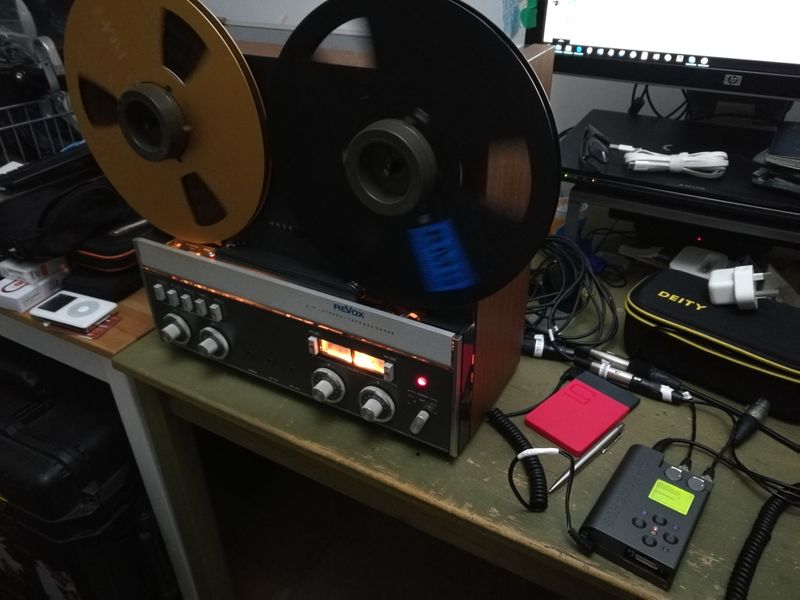
Digitizing R2R
Despite all of this, once you jump in, you may never want to turn back. If most of your bread and butter is ONLY using 1-4 channels and you want something better than what you hear these days, then this is the unit for you. I feel that because of it’s size and its unique design, this recorder is so inspirational for me and both my professional and artistic work. It is a joy to use in the field and I know that the audio from it will be the best.
Award-winning ASMR Ad shoot
Will this review make a difference? I hope so. I hope that this will at least encourage a software upgrade. I know I am probably the only one out of the 80 other people that own this unit that is using it in this way, if at all these days. Sonosax assured me that there is no second version coming out for this format but I really want to encourage it with this article. If they were able to design a miniature masterpiece such as the R82 8+ years ago, imagine what they could do today. Jacques, if you need someone to test or give more feedback for a new MiniR82 hardware or even software upgrade, please don’t hesitate to contact me!
Daydreaming
If any of you have any other comments or questions about the unit that I haven’t covered feel free to contact me!
Summary
Pros:
Size, weight, and track count
Preamps and limiters are superb
Runs on USB power
Cons:
Price
Format needs an updated version
Custom cabling
The monitoring and sends are not independent of each other
You cannot fully mute the analog inputs (faders 1-2)
The gain structure could be a bit more generous in the ‘L’ setting
The overheating issue is of some concern
Could use another software version update to add more functionality
Playback/ recording modes kind of fiddly (too many button presses)
---
Wish List
A few things I would like to see on a new hardware version would be:
Little finger pinches (or other designed element) on top of the knobs making it easier and more precise to adjust the faders. Keep it sexy!
No switched gain stages (‘L’ or ‘H’), or a more generous ‘L’ stage.
Keep the width but change the thickness and length of the unit to accommodate two more preamps or line input faders. This would eliminate the need for the Cable Techniques RX2 line mixer and keep everything clean and in one unit.
Get rid of hard drive and put more preamps instead. Or make it even thinner.
I would like to have all of the inputs and multipin connector on the bottom of the unit in a ‘Zaxcom Nomad XLR’ kind of design, but still using Binder or Lemo connectors. This would have a more ‘self-contained’ and compact footprint to maximize the layout of the top face with a larger screen, more buttons and knobs to efficiently use the 'real estate' on the face of the sound bag.
Keep the 3.5mm connectors to a minimum and use more Binder or Lemo connectors. Tuck ALL connections to the bottom of the unit so you have more room to expand the sides of the unit.
I would like to have true Iso tracks with the ability to make a separate mix.
Cover for the CF card slot and USB port to prevent debris coming in.
Buttons on the top to be more weatherproof. Maybe even replace the buttons with a push button joystick, ‘trackpad’, or touchscreen of some kind. Keep the mono LCD, though.
LCD quality needs to be upgraded. It might be an old part but perhaps if they are still manufacturing new units, they should find a more reliable part and replace.
A more reliable internal timecode generator and a dedicated TC input/output jack would be very nice.
Solid separation between the different inputs. I hear TC noise sometimes in the inputs.
A more resilient recorder for extreme environments. Overheating issues are the main problem at the moment. A more weatherproof unit would be great.
Electronic design should be redesigned to transfer or generate less heat while running.
Possibly add a small lcd or meter leds on one edge with only meters so that it can be used while positioned vertically.
DC battery meter readout that can be used with USB batteries if possible.
USB C connector with USB 3 transfer speeds.
Fader linking
---
A software version update would be the easiest way to add very convenient features for the existing hardware. Here are some of my suggestions for the update:
More metadata editing options, especially track naming.
Ability to rotate the screen at 90 degree intervals. Rotate the buttons to follow orientation of screen.
Configure button ‘hot combinations’ or ‘hot keys’ to go directly to the ‘routing’ and ‘monitor’ matrix windows or other configurable windows.
Start a recording while in ‘Record/ Solo’ mode.
Ability to turn LCD backlight and light-sensitive diode off.
Tone generator (software or hardware issue?)
Incremental save to HD while recording to prevent data loss during a power failure.
---
Links:
<--- Go back to bivouacrecording.com

